
Tree stand safety tips center on maintaining a 100% continuous connection to the tree using a certified Fall-Arrest System (FAS) from the moment your feet leave the ground. By combining a full-body harness, a continuous lifeline, and strict three-point contact climbing rules, hunters can completely eliminate the free-fall risks that cause elevated hunting fatalities.
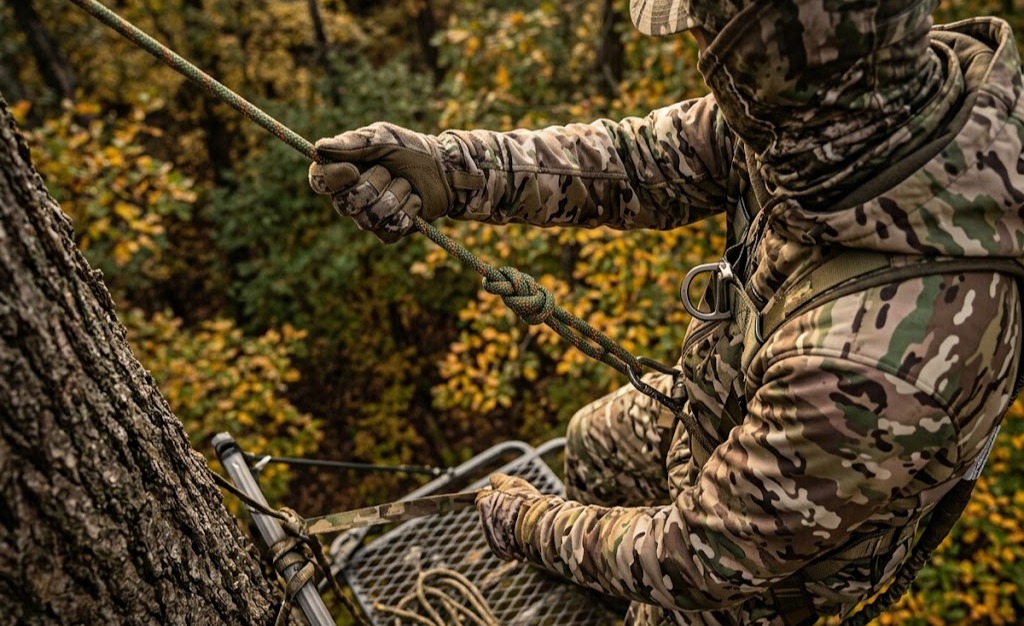
At a Glance
- Hunters must remain 100% tethered to a safety line whenever their boots are off the ground.
- A properly adjusted Fall-Arrest System prevents free-falls exceeding 0 to 12 inches.
- Suspension trauma becomes fatal in under 20 minutes if relief straps are not actively deployed.
- Synthetic ratchet straps have a strict 2 to 5-year safe lifespan before UV and weather degradation demands replacement.
- The Treestand Manufacturers Association (TMA) certifies standard equipment to maximum weight limits of 300 to 350 pounds (including heavy winter gear).
- Legacy single-strap waist belts are lethal in a fall and should be immediately destroyed.
Before You Start
- Total Setup Time: 15–25 minutes per hunt (excluding initial stand installation).
- Difficulty: Moderate (requires physical dexterity, balance, and basic knot/equipment knowledge).
- Cost: $150–$350 for foundational safety gear (Harness, Lifeline, Lineman’s rope, Haul line).
- Prerequisites: A TMA-certified full-body harness, a pre-installed lifeline (for fixed/ladder stands), and an unloaded weapon.
What Equipment Do You Need for Tree Stand Safety?
The foundation of elevated hunting safety requires matching the right platform to your physical capabilities and combining it with modern fall-arrest gear.
The Core Fall-Arrest System (FAS)
A complete FAS relies on four unbroken components:
- Full-Body Harness: Distributes fall forces across the strongest parts of the body (thighs, chest, and shoulders) rather than the fragile abdomen.
- Tether Line: The heavy-duty strap connecting the back of your harness to the tree.
- Lifeline (or Tree Strap): A continuous static rope running from the ground to the stand.
- Prusik Knot or Mechanical Ascender: A friction hitch that slides up the lifeline as you climb but instantly locks tight onto the rope under sudden downward weight.
Tree Stand Comparison: Safety Profiles
| Stand Type | Operating Mechanism | Safety Pros | Safety Cons & Limitations | Typical Price |
| Ladder Stands | A rigid platform atop a metal ladder strapped to the trunk. | Most stable; feels like scaffolding; easiest to climb. | Heavy; extremely dangerous to install solo without a ground crew. | $120 – $450 |
| Hang-On (Fixed) | Small platform chained to a tree, accessed via separate climbing sticks. | Fits irregular trees; highly concealable. | Requires high balance during installation; small platform space. | $80 – $250 |
| Climbing Stands | Two-piece unit (seat/base) allowing the hunter to inch up a limbless trunk. | No climbing sticks required; mobile. | High slip risk on wet/icy bark; strictly limited to straight trees. | $180 – $500 |
| Saddle Systems | Wearable fabric seat suspended from ropes at the tree apex. | Safest continuous tension; cannot fall out of a platform. | Steep learning curve with ropes; requires specialized core strength. | $250 – $600 |
Step 1: Inspect Ground-to-Platform Equipment
Thoroughly inspect the tree, the platform, and all fabric straps before you commit your body weight to the ascent.
- Exact Specifics: Scan the tree canopy for “widowmakers” (dead, unattached branches) that could fall in high winds. Check every ratchet strap and climbing stick attachment. Synthetic straps degrade rapidly under UV light and temperature swings; replace any strap older than 2 to 5 years, or immediately if you spot fraying, bleaching, or rust on the buckles.
- Success Checkpoint: You will know it is safe to proceed when the tree shows green foliage/healthy bark, all metal contacts are flush with the trunk, and strap webbing is supple and vividly colored.
- Common Mistake: Choosing a tree solely based on deer trails while ignoring rotting bark. A dead tree will snap under the lateral leverage of a hang-on stand, dropping the hunter regardless of their harness.
Step 2: Secure the Harness on the Ground
Put on your full-body harness and verify every buckle while your feet are flat on the earth.
- Exact Specifics: Step through the leg loops and buckle the chest strap. Adjust the leg straps so they are snug-you should barely be able to slide a flat hand between the strap and your thigh. A loose leg strap will aggressively snap upward into the groin during a fall, causing severe injury.
- Success Checkpoint: You will know it worked when the tether attachment loop rests squarely between your shoulder blades, not sagging down your back.
- Common Mistake: Waiting to put the harness on until halfway up the tree or after reaching the platform. Over 80% of elevated hunting falls occur during the transition into or out of the stand, not while seated.
Step 3: Connect to the Lifeline
Attach your harness tether to the continuous lifeline before placing your foot on the first ladder rung or climbing stick.
- Exact Specifics: Clip your locking carabiner through the loop of the sliding Prusik knot attached to your lifeline. If hunting in freezing rain where Prusik knots can freeze solid, substitute the knot with a certified mechanical ascender. Verify the carabiner gate is rotated shut and locked.
- Success Checkpoint: Give the Prusik knot a sharp downward tug. It should bite instantly into the lifeline and refuse to slide.
- Common Mistake: Cross-loading the carabiner. Carabiners are immensely strong along their vertical spine but can shatter under a fraction of the weight if pulled horizontally across the locking gate.
Step 4: Execute the 3-Point Climb
Ascend the tree while maintaining a rigid physical connection to the ladder or climbing sticks at all times.
- Exact Specifics: Keep either two hands and one foot, or two feet and one hand, firmly planted on the steps. Move only one limb at a time. If using a climbing stand, limit your upward movements to a maximum of 10 inches per step to prevent the top and bottom sections from separating out of reach. Slide your Prusik knot up the lifeline smoothly as you climb, keeping it positioned above your head.
- Success Checkpoint: You’ll know your pace is correct if your center of gravity remains directly over your feet and you are not leaning backward to reach the next rung.
- Common Mistake: Carrying gear in your hands or wearing a heavy backpack during the climb. This shifts your center of gravity outward, pulling you away from the tree and inducing arm fatigue.
Step 5: Transition to the Platform and Tether In
Step down onto the center of the platform and finalize your permanent tether connection.
- Exact Specifics: Step onto the exact center of the metal grating where it meets the tree—never the outside edge. Once both feet are planted, wrap your primary tree strap around the trunk as high above your head as you can comfortably reach. Connect your harness tether to this strap. Adjust the tether so there is a maximum of 0 to 12 inches of slack when you sit down.
- Success Checkpoint: When seated, the tether should be taut enough to gently pull against your back. This near-zero slack ensures that if the platform drops, you do not free-fall; you simply swing in place.
- Common Mistake: Leaving three feet of slack in the tether so you can “move around easier.” A three-foot free-fall generates thousands of pounds of kinetic energy, enough to snap carabiners, tear straps, or cause severe spinal whiplash.
Step 6: Use a Haul Line for Gear
Raise your unloaded weapons and heavy gear only after you are seated and securely tethered.
- Exact Specifics: Drop a heavy-duty paracord pull rope to the ground. Slowly pull up your gear. Always route the haul line on the side of the stand opposite to your climbing path so the rope does not tangle in your ladder or climbing sticks.
- Success Checkpoint: The weapon arrives at the platform completely unloaded, with the muzzle pointed away from your body, and broadheads securely covered in a rigid quiver.
- Common Mistake: Tying the haul line to the trigger guard of a firearm or pulling a loaded bow up by the cam. Tie off to the sling swivels or the riser to maintain structural integrity and muzzle discipline.
What Are the Most Common Tree Stand Mistakes?
Tree stand accidents are rarely equipment failures; they are almost exclusively procedural errors.
- Using Legacy Single-Strap Belts: Single-strap waist belts or chest harnesses are incredibly dangerous. In a fall, they jerk tight around the abdomen or diaphragm, causing immediate internal injuries, asphyxiation, or rapid loss of consciousness. Only TMA-certified full-body harnesses are safe.
- Leaving Straps Out Year-Round: Leaving ratchet straps exposed to harsh winters and baking summer sun breaks down synthetic fibers at a molecular level. A strap left out for 12 months retains less than half its original breaking strength.
- Climbing Without a Lineman’s Belt: When initially installing a hang-on stand, hunters often rely purely on arm strength to hold the stand while wrapping the strap. You must use a lineman’s rope (a strap around the tree connected to both hips of your harness) to allow two-handed, leaning work.
- Ignoring Weight Limits: The TMA certifies typical stands to 300–350 pounds. Hunters often calculate only their body weight, forgetting that insulated winter clothing, boots, a weapon, and a pack can easily add 40 to 50 pounds, pushing them past the structural failure point.
How Do You Survive a Fall and Suspension Trauma?
Surviving a fall requires immediate action because of a physiological phenomenon called suspension trauma (orthostatic intolerance). When suspended in a harness, gravity pulls your blood into your legs. Without the leg muscles actively walking to pump that blood back up, venous pooling occurs. Within 20 minutes, the brain is deprived of oxygen, leading to fainting and potentially fatal cardiac arrest.
If you fall and are suspended, follow this exact sequence:
- Do Not Panic: Breathe deeply to conserve oxygen and assess your immediate physical connection to the tree.
- Deploy the Suspension Relief Strap: Pull the continuous loop strap from your harness pouch, drop it down, and step into it. Standing up in this loop instantly relieves the pressure on your femoral arteries and allows your leg muscles to pump blood back to your heart.
- Pump Your Legs Continuously: If you do not have a relief strap, aggressively push your legs against the tree bark or pump them in midair as if riding a bicycle.
- Execute Self-Recovery: If you were using a climbing stand and the bottom section slipped, hang from your top section, use your connecting rope (which should always tether the top and bottom halves together) to pull the base back up, re-engage the teeth into the bark, and climb down.
- Signal for Help: Use a whistle or cell phone located in a chest pocket (never in your backpack) to call emergency services or your designated check-in buddy.
Which Setup Should You Choose?
Selecting the right stand depends entirely on your physical ability and the terrain you hunt.
For Beginners and Private Land Owners
Choose Ladder Stands. They offer the structural stability of home scaffolding and require no complex setup while suspended in the air. Because they are heavy and highly visible, they are best suited for private land where they can be set up once before the season by a team of two or more people.
For Mobile Public Land Hunters
Choose Hang-On Stands or Saddle Systems. Public land regulations usually forbid screwing steps into trees, making mobile strap-on climbing sticks mandatory. Saddle systems offer the lightest weight profile (under 8 pounds) and provide 360-degree shooting angles, though they require a steep learning curve regarding rope management.
For Elderly or Physically Limited Hunters
Choose Ground Blinds or Box Blinds. If maintaining a firm, 3-point hold is difficult due to shoulder injuries, arthritis, or balance constraints, safety organizations explicitly recommend staying on the ground. A fall recovery requires significant core and upper body strength; if self-recovery is not possible, do not leave the ground.
Frequently Asked Questions
Can I use a rock climbing harness for tree stand hunting?
While rock climbing harnesses are structurally sound for catching falls, they are not ideal for tree stand hunting. They are designed for dynamic rope falls where the user is facing the rock. Tree stand harnesses are designed with a dorsal (back) tether attachment to keep you upright and facing the tree after a fall, keeping your hands free for self-recovery.
How high should a tree stand be?
Most tree stands are placed between 12 and 20 feet high. This height is sufficient to get out of the direct sightline of whitetail deer and helps disperse human scent above ground-level thermal drafts. Climbing higher than 20 feet drastically increases the lethality of a fall without significantly improving concealment.
What happens if my climbing stand slips?
If the bottom platform of a climbing stand slips down the tree, do not jump. You should have a parachute cord tying the top seat section to the bottom foot section. Hang from your secure upper section, use the cord to pull the foot platform back to your boots, angle it upward to bite into the bark, and slowly descend the tree.
Are homemade wooden tree stands safe?
No. Homemade wooden stands nailed directly into trees are incredibly dangerous. Nails rust, living trees grow and push the nails out, and untreated wood rots quickly when exposed to weather. Never trust your life to a permanent wooden structure built in a living tree.
Can I leave my lifeline out all year?
No. Lifelines are made of nylon or polyester ropes that degrade under the sun’s ultraviolet rays. Leaving a lifeline in the woods 365 days a year weakens the core fibers and encourages mold and rodent damage. Pack your lifeline away at the end of every hunting season and store it in a dry, dark place.