
Learning how to avoid hunting accidents requires mastering a strict workflow of firearm safety, tree stand discipline, and situational awareness. By following these 9 sequential steps, you eliminate the variables that cause injury in the field. This protocol adds mere minutes to your trip, but making strict muzzle control an automatic habit is the single factor that guarantees your safe return.
Before You Start
- Time Required: 10–14 hours for mandatory education; 15 minutes of pre-hunt prep.
- Difficulty: Moderate (Requires strict mental discipline and routine building).
- Cost: $220–$800 for safety-specific gear (harnesses, orange, GPS).
- Tools & Materials:
- TMA-certified Full-Body Fall Arrest System (FAS) with a lineman’s belt.
- 400–500 sq. inches of Blaze Orange clothing (vest/hat).
- Satellite communicator (e.g., Garmin inReach) with SOS capability.
- Dedicated 8×42 or 10×42 binoculars.
- 20-foot paracord haul line.
- Prerequisites: Completion of an International Hunter Education Association (IHEA) certified state course.
Phase 1: Pre-Hunt Preparation
Step 1: File a Detailed Hunt Plan
Write down your exact itinerary and give it to a trusted contact before leaving cellular service. Include your specific parking coordinates, the exact location of your blind or tree stand, your vehicle’s make and license plate, and a strict “call search and rescue” cutoff time.
- Success Checkpoint: You’ll know this step is complete when your contact texts back confirming they understand your panic time.
- Common Mistake: Giving a vague location like “hunting the north ridge.” If you suffer a medical emergency, responders need GPS coordinates, not general landmarks.
Step 2: Inspect Firearms and Safety Gear
Verify the mechanical soundness of your weapon and tree stand equipment before loading your vehicle. Run a patch through your firearm’s barrel to check for obstructions (mud, snow, or rust). Inspect your tree stand straps and tether lines for dry rot, fraying, or rodent damage.
- Success Checkpoint: The firearm action cycles smoothly, the barrel is visually clear of debris, and no nylon safety straps show exposed inner fibers.
Phase 2: Tree Stand and Elevated Safety
Step 3: Maintain Three Points of Contact
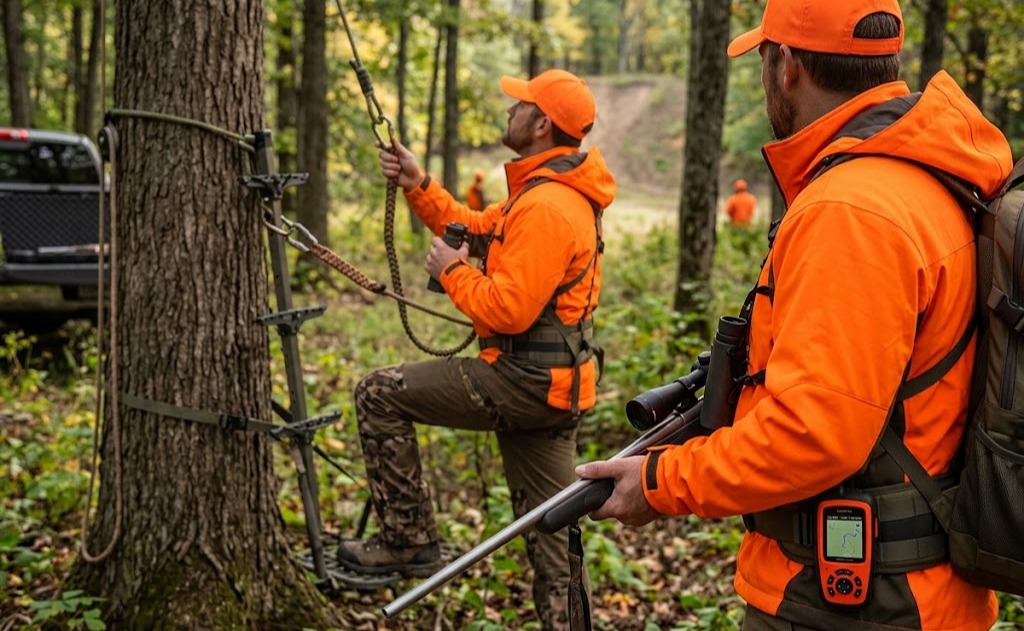
Keep two hands and one foot, or one hand and two feet, firmly anchored to the ladder or climbing sticks at all times. Before your feet ever leave the ground, attach your lineman’s belt around the tree. Slide it up as you climb so you are physically attached to the tree during the entire transition onto the platform.
- Success Checkpoint: If the ladder were to suddenly kick out, your lineman’s belt would immediately catch your weight, leaving you suspended safely against the trunk.
- Common Mistake: Waiting until you are standing on the platform to attach your main tether. 80% of elevated accidents happen during the transition onto or off the stand.
Step 4: Use a Haul Line for Your Firearm
Tie a heavy-duty haul line (at least 20 feet long) to your unloaded firearm or bow on the ground. Climb into your stand, fully attach your full-body harness to the tree tether, and pull the rope up hand-over-hand.
- Success Checkpoint: You are securely harnessed to the tree before your weapon reaches the platform.
- Common Mistake: Slinging a loaded rifle over your shoulder while climbing. A branch can easily snag the trigger, discharging the weapon directly upward into your body.
Phase 3: Field Navigation and Muzzle Control
Step 5: Load Only When in Your Hunting Area
Keep your firearm unloaded with the action fully open while walking from your vehicle to your hunting spot. Do not chamber a round until you are stationary in your blind or secured in your stand. When crossing fences, creeks, or steep deadfall, physically check the chamber to ensure it is empty.
- Success Checkpoint: When navigating rough terrain, you can visually see daylight inside the open action of your firearm.
Step 6: Establish Safe Carries and Fire Zones
Control your muzzle direction based on your environment. Use a two-hand carry (hands on grip and forearm, muzzle up) in thick brush for maximum control. If hunting in a group, walk abreast (in a line side-by-side) and explicitly define a 45-degree swinging zone of fire directly in front of each hunter.
- Success Checkpoint: You and your partners can walk for miles without the muzzle of any firearm ever crossing a human body.
- Common Mistake: Using a shoulder sling carry in heavy brush. Branches can grab the barrel, sweeping the muzzle backward toward partners walking behind you.
Phase 4: Target Identification and Firing
Step 7: Positively Identify Targets with Optics
Use dedicated binoculars to scan the woods and identify the species, sex, and legal size of the animal. You must be able to see the entire head and torso to ensure it is a legal game animal and not another hunter carrying a decoy or harvested game.
- Success Checkpoint: You have positively identified the animal’s eyes, ears, and body positioning using binoculars before ever touching your firearm.
- Common Mistake: Using your rifle scope to scan for movement. Doing so means you are actively pointing a loaded weapon at an unidentified target, which could be a human.
Step 8: Verify the Foreground and Background
Check the space between you and the animal, and the space directly behind it. Ensure there is no heavy brush that could deflect the bullet (a small twig can alter a bullet’s trajectory by 10 feet), and verify there are no hunters, livestock, roads, or buildings in the background.
- Success Checkpoint: You have a clear dirt or hillside backstop directly behind the animal that will safely catch a pass-through bullet.
Step 9: Keep Your Finger Off the Trigger
Rest your trigger finger flat against the frame of the receiver above the trigger guard. Do not move your finger inside the guard until your crosshairs are on the vitals of the fully identified target, the safety is clicked off, and you have made the final decision to shoot.
- Success Checkpoint: If you trip or suffer a sudden muscle spasm, the firearm cannot discharge because your finger is resting on solid metal, not the trigger.
- Common Mistake: Relying on the mechanical safety. Safeties are mechanical devices that fail due to wear or freezing temperatures; trigger discipline is your only absolute guarantee against accidental discharge.
Common Mistakes and How to Fix Them
- Stalking a turkey gobble or elk bugle on public land: You may be stalking another hunter imitating an animal. Fix: Set up a static position and call the animal to you. Never stalk sounds in high-pressure hunting areas.
- Relying entirely on cellular phones for rescue: Batteries drain rapidly in cold weather, and cell towers rarely cover backcountry basins. Fix: Carry a satellite messenger (like an inReach) tucked in an inside pocket close to your body heat.
- Removing orange clothing in the blind: Hunters often take off blaze orange once seated to avoid detection. Fix: Drape your orange vest over the roof or out the window of your ground blind so other hunters know the blind is occupied.
- Assuming an empty chamber: Racking the bolt backward doesn’t guarantee an empty gun if the extractor fails to pull the shell. Fix: Always visually and physically (with your pinky finger) inspect the chamber to ensure it is empty.
Environmental and Tactical Variations
- Public Land Hunting: Assume someone is always within 200 yards of you. Wear a minimum of 500 square inches of solid Blaze Orange even during archery-only seasons. Use a bright headlamp when walking in the dark to distinctly identify yourself as human.
- Backcountry Wilderness Hunting: The primary threat shifts from other hunters to the environment. Hypothermia and navigation loss lead to panic, which precipitates firearm mishandling. Prioritize a robust first-aid kit, emergency space blankets, and offline GPS maps.
- Waterfowl Hunting from Boats: The unique danger is capsizing in freezing water while wearing heavy waders. Life jackets (PFDs) are non-negotiable. Establish strict firing lanes (e.g., 10-to-2 o’clock for the bow shooter, 8-to-10 o’clock for the port shooter) to prevent sweeping the boat.
Cost and Time Investment for Safety
Avoiding accidents requires a minor but mandatory investment. A state-sanctioned IHEA course takes 10 to 14 hours and costs between $15 and $40. High-quality TMA-certified harnesses range from $50 to $150. If hunting out of cellular range, a satellite communicator requires a $300 upfront purchase and a $15 monthly subscription. This sub-$500 total investment is negligible compared to the medical and legal costs of a hunting incident.
Frequently Asked Questions
What is “buck fever” and how does it cause accidents? Buck fever is an extreme spike in adrenaline that occurs when a hunter spots game. It can cause temporary tunnel vision, hallucinations (mistaking a person for a deer), and loss of fine motor skills, leading to premature or unsafe trigger pulls.
Can deer see Blaze Orange? No. Deer and elk are ungulates with dichromatic vision, meaning they are essentially red-green colorblind. To them, solid blaze orange appears as a muted gray or brown. It alerts humans to your presence without spooking the game.
Why shouldn’t I use camouflage blaze orange? While camo-blaze (orange with black breaking patterns) disrupts your silhouette, it is not legally recognized as sufficient safety apparel in many states or provinces during big game firearm seasons because it reduces overall human visibility at long distances.
What is suspension trauma? If you fall from a tree stand and hang in your harness, the leg straps compress your femoral arteries, causing blood to pool in your legs. This can be fatal in under 30 minutes. A TMA-certified harness includes a suspension relief strap you step into to relieve leg pressure while waiting for rescue.
Knowing how to avoid hunting accidents is the foundational skill of outdoor recreation. By rigorously separating target identification from target acquisition, treating every firearm as loaded, and respecting the lethality of gravity from a tree stand, you ensure the tradition remains safe for everyone sharing the woods.