
Learning how to use hunting calls allows you to mimic wild vocalizations and draw game within ethical shooting range through an eight-step process covering call conditioning, wind-checked positioning, mechanical operation, and cadence control. Expect 30 to 60 minutes of initial practice for moderate difficulty, where success depends most on freezing your movement before the animal spots the source of the sound.
Before You Start
- Time Required: 15 minutes for conditioning and setup; 30–60 minutes per calling stand.
- Difficulty Level: Easy (Box and Electronic Calls) to Advanced (Diaphragm Reeds).
- Typical Cost: $10–$300 depending on call category.
- Tools & Materials Checklist:
- 1 Primary Hunting Call: Box call ($20–$60), friction pot call ($20–$45, e.g., Zink Thunder Ridge Slate or Hunters Specialties Camo Cutt’R), diaphragm reed ($10–$30, e.g., Riven Tremor or Phelps AMP 3-Pack), or remote electronic caller ($25–$300+, e.g., Cass Creek Ergo or Foxpro Patriot).
- 1 Conditioning Kit: Oil-free box call chalk (white carpenter’s chalk), a 100-grit drywall sanding screen (for slate), and a 60-grit silicon carbide stone or green Scotch-Brite pad (for glass/crystal/aluminum).
- 1 Pair of Curved Scissors: Small manicure scissors for trimming diaphragm tape skirts.
- 1 Wind Indicator: Talcum powder squeeze bottle or milkweed pods.
- 8–10 AA Lithium Batteries: Required if running a remote electronic unit and motorized decoy in sub-freezing temperatures.
- Prerequisites: Current state hunting regulations booklet and full camouflage including a facemask and thin tactile gloves.
Phase 1: Preparation and Call Conditioning
Step 1: Verify Legal Call Restrictions and Match Your Species
Check your state wildlife agency’s current regulations to confirm whether electronic or amplified calls are legal for your target species. Digital electronic game calls are legal for coyotes, foxes, crows, and conservation-order snow geese in most jurisdictions, but they are strictly prohibited for wild turkey, deer, elk, and waterfowl under state and federal fair-chase laws. Select a friction call (box or pot) for calm-to-moderate timber hunts, or a hands-free diaphragm reed if you are bowhunting or targeting pressured elk and turkeys.
- Success Checkpoint: You’ll know it worked when your call category matches both the legal weapon-season code for your management unit and the vocal frequency of your target animal.
- Common Mistake: Packing an electronic caller or battery-operated acoustic decoy in your vest during spring turkey or autumn big-game seasons—even unpowered possession in the field counts as a citation in many states.
Step 2: Condition the Friction Surface or Trim the Reed Skirt
Prepare your call’s contact surface so it generates clean acoustic friction without slipping or gagging you.
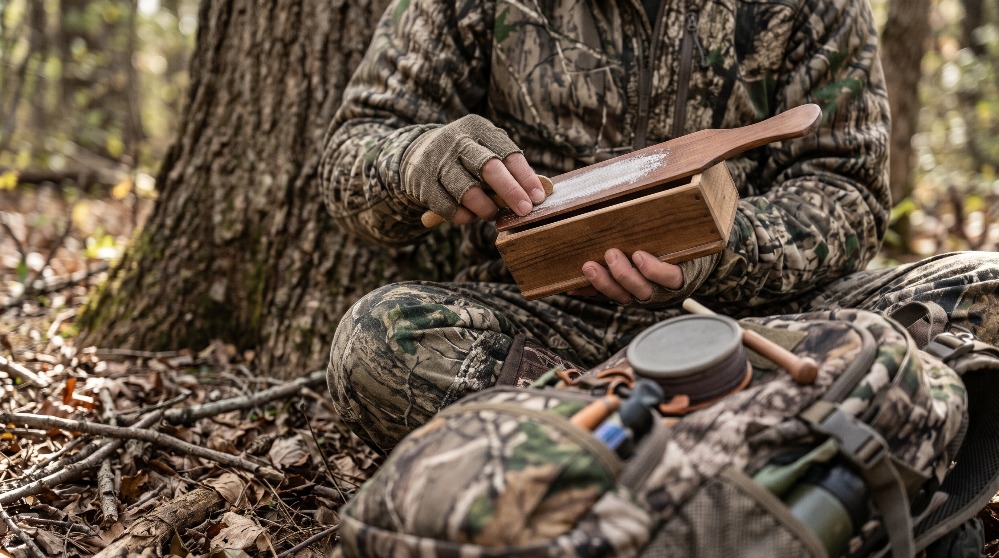
- For Box Calls: Rub oil-free white chalk evenly across the Curved underside of the paddle lid—never on the thin wooden side rails of the box. Blow off loose dust.
- For Friction Pot Calls: Hold your 100-grit sanding screen or Scotch-Brite pad flat against the pot surface and scrub straight back and forth in one single direction (north-to-south) for 10 strokes to create microscopic parallel grooves. Clean the tip of your hardwood or acrylic striker with 3 clean twists inside the pad.
- For Diaphragm Reeds: Place the horseshoe frame against the roof of your mouth with the open end facing forward and the V-cut or longest latex reed on top. If the tape triggers a gag reflex or buckles at the edges, use curved manicure scissors to trim 2–3mm off the outer tape ring, following the exact contour of the frame.
- Success Checkpoint: You’ll know it worked when a box lid feels gritty against the rail, a pot call shows uniform matte scratches running in one direction, or a mouth reed seals completely against your palate without air leaking over the top of the tape.
- Common Mistake: Using standard classroom chalk on a box call (which contains wax that ruins wood friction forever) or sanding a slate pot call in circles, which destroys the directional grain you need to strike against.
Phase 2: Tactical Field Setup
Step 3: Set Up Downwind with Solid Back Cover
Position yourself against a tree trunk, rock, or brush pile that is wider than your shoulders, situated 30 to 50 yards downwind or crosswind of where you expect the animal to approach. Squeeze your wind-indicator bottle before sitting down to verify air current direction; approaching game (especially coyotes, elk, and mature bucks) will almost always circle downwind of a call’s origin to scent-check the caller before stepping into view. Ensure you have a clear 20-to-40-yard shooting lane upwind and crosswind of your hiding spot.
- Success Checkpoint: You’ll know it worked when your wind indicator drifts away from the primary cover trail and your silhouette is completely broken by shadow and background timber.
- Common Mistake: Sitting inside a thick bush rather than in front of it, which blocks your gun barrel or bow limbs from swinging and traps your own acoustic sound waves close to the ground.
Step 4: Stage Your Electronic Speaker or Secure Hand Calls
Place your calls within 6 inches of your chest so you can access or drop them with less than 3 inches of hand movement. If using a remote digital electronic caller like the Foxpro Patriot, walk 30 yards upwind or crosswind of your hide and elevate the speaker 2 to 3 feet off the ground in a low bush or on a tripod. Elevating the speaker prevents ground foliage from muffling high-frequency distress audio and forces approaching predators to lock their eyes 30 yards away from your actual shooting position.
- Success Checkpoint: You’ll know it worked when your remote triggers the speaker cleanly from your seat, or your pot/box call rests in a chest tether or knee pocket that you can reach without moving your elbows.
- Common Mistake: Setting an electronic speaker directly on flat dirt or snow in front of you, which cuts acoustic range by 50% and draws the animal’s line of sight straight into your lap.
Phase 3: Mechanical Execution and Cadence
Step 5: Execute the Primary Calling Stroke or Air Drive
Operate your chosen call using the specific mechanical pressure and angle required for its design:
- Traditional Box Call: Hold the base box by its bottom heel so your fingers never touch the thin sounding boards. Rest your thumb lightly on top of the paddle handle, angle the paddle 15 degrees off the right rail, and tap or draw it inward across the rail lip in a smooth, 1-inch arc, letting it snap off the edge cleanly.
- Friction Pot Call: Cup the bottom of the pot in your non-dominant palm with your fingertips elevating the soundboard off your skin (never block the bottom sound holes). Hold the striker like a pencil 1 inch above the tip, place it on the pot perpendicular (90 degrees) to your sanded conditioning lines, tilt the top of the striker 15–20 degrees away from you, and draw the tip toward your body in tight, 3/16-inch ovals (for yelps) or short 1/8-inch downward snaps (for clucks).
- Mouth Diaphragm Reed: Press the center of your tongue firmly upward against the flat latex reeds (not the metal frame), sealing the tape against the roof of your mouth. Drop your lower jaw 1/2 inch and expel air from your diaphragm—not your cheeks—by huffing the word “chuck” (for a turkey cluck), “peee-yuk” (dropping tongue pressure mid-breath for a two-note yelp), or ramping tongue pressure from light to heavy for a rising elk bugle.
- Electronic Caller: Start playback at Volume Level 2 or 3 (roughly 50–60 dB) for the first 3 minutes so you do not spook animals bedded within 75 yards, then step up to Volume Level 6–8 (85–95 dB) after 4 minutes to reach distant game.
- Success Checkpoint: You’ll know it worked when your call produces a distinct two-note rollover (high clear front note breaking into a raspy lower back note) without high-pitched squeaking or hollow wood scraping.
- Common Mistake: Gripping the side walls of a box call or pressing a pot call flat against your leg, which deadens the acoustic chamber and turns realistic notes into flat, wooden thuds.
Step 6: Space Your Cadence and Observe Silent Wait Windows
Match your calling rhythm to natural animal communication patterns rather than calling continuously. Wild prey and game birds vocalize in brief bursts and spend 90% of their time listening:
- Wild Turkey (Yelping): Run a 5-to-7-note yelp series lasting 3 seconds total, pause for 30 seconds, repeat once, and then sit in complete silence for 15 to 20 minutes.
- Whitetail Deer (Grunting): Blow 2 to 3 short tending grunts lasting 0.5 seconds each, spaced 4 seconds apart, then wait 20 to 30 minutes before calling again.
- Predators (Distress): Play or blow high-pitched rabbit distress for 45 to 60 seconds, pause for 60 seconds, and repeat for a total stand time of 18 to 25 minutes (35–45 minutes if targeting bobcats).
- Success Checkpoint: You’ll know it worked when your calling bursts last under 60 seconds and you spend at least 80% of your time on stand scanning downwind terrain in dead silence.
- Common Mistake: Calling every 60 seconds when you don’t get an immediate vocal response; silent animals frequently walk in slowly on the ground and will bust you if they catch your hands moving mid-sequence.
Step 7: Read the Animal’s Demeanor and Throw Your Voice
Adjust your call intensity and direction the instant an animal responds vocally or appears at the edge of cover. If an approaching turkey, bull elk, or buck hangs up out of range (stops at 70–100 yards and stares toward your tree), immediately cut your volume by 70%—switch from loud cuts and bugles to soft, barely audible clucks, purrs, or antler foliage rakes. If using a mouth diaphragm or open-reed call, turn your head 45 degrees away from the animal or cup your gloved hand behind the call to bounce the sound into the brush behind you, creating the illusion that the vocalizing animal is moving away.
- Success Checkpoint: You’ll know it worked when a hung-up animal drops its alert posture, lowers its head, and takes those final 15 to 20 steps into your shooting lane to investigate the “retreating” sound.
- Common Mistake: Calling louder at an animal that can already see your setup area; once an animal has visual line-of-sight to the spot the sound came from, loud calling confirms nothing is standing there and causes them to spook.
Step 8: Transition to Your Weapon Before the Animal Clears Cover
Put down hand-operated calls and bring your firearm to your shoulder or clip your archery release onto your D-loop the moment the animal passes behind a tree trunk or dip in terrain at 50–60 yards out. If running a box or pot call, slide it silently onto the ground beside your hip or let it hang on its lanyard while the animal’s eyes are obstructed—never attempt to drop a striker while a turkey, deer, or coyote is looking in your direction with unobstructed vision. Keep a diaphragm reed in your mouth to deliver one final soft stopping vocalization (“mew” for elk, “eh” grunt for whitetails, or soft bark for coyotes) once your sights are pinned on the vitals.
- Success Checkpoint: You’ll know it worked when your cheek is welded to your stock or your bow is at full draw before the animal steps into your designated 20-to-40-yard shooting window.
- Common Mistake: Holding a pot call and striker until a tom turkey or buck is at 25 yards in the open, forcing you to make a sudden two-handed drop-and-raise movement that blows the shot at the last second.
Common Mistakes and How to Fix Them
| Failure Mode / Symptom | Root Cause | Exact Field Fix |
| Pot call striker skips or squeaks with no rasp | Striker tip has oil from your fingers, or you are drawing parallel to the conditioning grooves instead of across them. | Twist the striker tip 3 times in a green Scotch-Brite pad, rotate the pot 90 degrees so you strike perpendicular to the grain, and increase downward tip pressure by 20%. |
| Box call sounds hollow, high-pitched, or squeaky | Finger tips are resting on the thin upper side walls of the box, or the paddle lid is glazed from humidity. | Move your grip down to the solid 1/2-inch bottom base block only; score the underside of the paddle lightly with 150-grit sandpaper and reapply oil-free white chalk. |
| Diaphragm reed produces a flat hiss or high squeal | Air is leaking over the top of the frame (bad palate seal) or you are biting the metal horseshoe with your teeth. | Push the call 3mm further back onto the deeper arch of your palate, press your tongue flat against the center latex, and breathe from your stomach as if fogging a mirror on a cold day. |
| Wood box or slate pot gets wet in a rain shower | Moisture swells raw wood grain and turns slate dust into slick mud, killing surface friction. | Do not try to chalk a wet box call—it creates a gummy paste. Seal the wood call in a dry pocket, switch to a waterproof diaphragm reed or an acrylic/crystal pot call with a carbon-fiber striker, which runs wet. |
| Animals answer from 150 yards away but never close the distance | Over-calling. In nature, the subordinate animal frequently travels to the dominant caller; if you sound too eager, they wait for you to walk to them. | Stop calling completely for 30 minutes. Scratch dry leaves with a stick 3 times to mimic walking footsteps, forcing the animal’s curiosity or jealousy to override its caution. |
Variations for Different Hunting Scenarios
1. Bowhunting vs. Firearm Hunting
When hunting with a compound or traditional bow, you cannot afford two-handed movement inside 60 yards. Use a box or crystal pot call only as a long-range locator call to strike a response from 150+ yards away. Immediately stow the hand call and switch exclusively to a mouth-operated diaphragm reed (like the Riven Tremor or Phelps AMP). This allows you to draw your bow string while an animal’s eyes are behind a single tree trunk and stop a trotting animal at 25 yards with a hands-free vocalization while looking through your peep sight.
2. High Wind (15+ MPH) vs. Dead Calm (<5 MPH)
- High Wind (15+ MPH): Soft slate pots and standard single-reed diaphragms get swallowed by wind noise in swaying timber. Switch to a long boat-paddle box call or an aluminum/crystal pot call paired with a dense Dymondwood or acrylic striker. The high-frequency metallic pitch slices through wind shear up to 400 yards away.
- Dead Calm (<5 MPH): High-pitched glass calls and loud box cuts will echo unnaturally off hardwood ridges and spook close game. Switch to a natural slate pot call with a hickory striker or a light two-reed ghost-cut diaphragm, keeping your volume no louder than a normal human whisper.
3. Solo Calling vs. Two-Hunter Team Setup
When hunting solo, your biggest disadvantage is that the sound originates from the exact tree you are sitting against—meaning the animal arrives looking directly at your body. In a two-hunter team setup, place the Shooter 35 to 40 yards upwind (closer to the animal’s expected approach) and the Caller 35 to 40 yards directly behind the Shooter. As the animal approaches to visually locate the Caller, it walks broadside right past the silent, motionless Shooter before it ever enters the danger zone of the Caller’s movement or scent cone.
How Long Does It Take & What Does It Cost?
| Call Category | Mastery Timeline | Typical Price Range | Lifespan & Consumable Costs |
| Traditional Box Call | 15–30 minutes | $20–$60 (Standard) $100+ (Custom) | Lifetime if kept dry; $3 oil-free chalk stick lasts 3–5 seasons. |
| Friction Pot Call | 1–3 hours | $20–$45 (Pot + Striker) | 10+ Years; $4 conditioning stone/pad replacements every 2 seasons. |
| Diaphragm Mouth Reed | 5–14 days (15 min/day) | $10–$13 (Single) $25–$35 (3-Pack) | 1 Season; latex degrades from saliva and UV light—replace every spring/fall. |
| Digital Electronic Call | 5 minutes | $25–$30 (Handheld) $150–$350+ (Remote) | 5–8 Years; requires $15–$25 in lithium AA batteries or rechargeable packs per season. |
Frequently Asked Questions (FAQ)
How do I store diaphragm mouth reeds so the latex doesn’t rot between hunts?
Rinse your diaphragm reeds in cool tap water after every hunt to remove saliva enzymes, slide a plastic tooth-pick or reed separator between the latex layers so they don’t stick together as they dry, and store them inside a vented plastic case in your refrigerator door (never the freezer) away from heat and sunlight.
Can I use the same diaphragm reed for both turkey and elk calling?
Physically, the frames are identical, but the latex thickness and reed cuts differ. Elk diaphragms (like the Phelps AMP) use thicker, single-layer latex engineered to withstand heavy lung pressure without blowing out during loud bugles, whereas turkey diaphragms use 2 to 4 thin latex layers with V-cuts or batwing cuts to create raspy, low-pressure yelps.
How often should I re-chalk a box call or sand a slate pot call in the field?
Re-chalk a box call paddle once every 15 to 20 calling sequences, or immediately if the lid skips silently across the rail without biting. Lightly buff a slate or glass pot call with your conditioning pad for 5 strokes before each morning hunt and again at midday to clear skin oils and airborne dust.
Why do coyotes circle downwind of my electronic caller and run away before I see them?
Coyotes use the wind to scent-check the area downwind of any distress sound before committing to a meal. If your electronic speaker is placed upwind of your blind, the coyote’s downwind loop crosses right through your human scent stream; always place the speaker crosswind or upwind with an open, unobstructed shooting lane covering the entire downwind side.
Which cut of diaphragm mouth call is easiest for a first-time caller to learn on?
Start with a two-reed ghost cut or a standard double-reed V-cut with light latex tension. Single reeds require precise tongue control to prevent squeaking, and heavy triple-reed batwing cuts demand high air volume, whereas a light two-reed V-cut breaks over from a clear high note into a raspy low note with minimal breath pressure.
Mastering how to use hunting calls comes down to matching the right tool to the weather, conditioning your friction surfaces before stepping out of the truck, and letting patience do the heavy lifting once an animal responds. Start with a chalked box call or slate pot to build confidence in your cadence, practice with a trimmed diaphragm reed during your daily commute until it becomes second nature, and always have your weapon up before the animal steps into view.