
Learning how to scout hunting locations systematically turns random luck into predictable harvest opportunities. By executing a 9-step progression-moving from state harvest analysis and digital mapping to long-distance glassing, physical sign reading, and trail camera monitoring-you will lock in high-odds ambush sites in 2 to 4 weekends. The process is intermediate in difficulty, and success hinges on one critical rule: locating active feeding-to-bedding funnels without alerting resident game to your human scent.
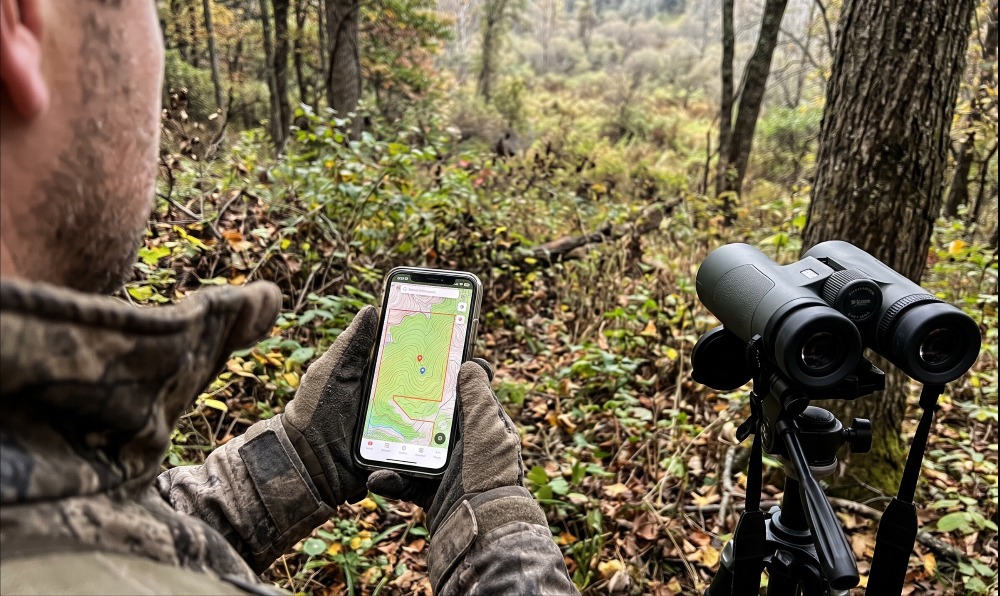
Before You Start: Prerequisites & Gear Checklist
- Time Required: 3–5 hours (Digital E-Scouting) + 1–3 days (In-Field Verification) + 14–30 days (Camera Soak Time).
- Difficulty Level: Intermediate (requires basic map reading and off-trail navigation).
- Typical Cost Range: $0 to $350 (up to $2,000+ if purchasing high-end Western glassing optics).
- Prerequisite Conditions: Obtain valid state hunting/access permits; verify public land access dates; begin physical boots-on-the-ground scouting in late winter (post-season) or at least 3–4 weeks prior to opening day.
Phase 1: Macro Data & Digital E-Scouting
Step 1: Filter Units Using State Data and Local Intel
Analyze state wildlife agency harvest reports and conduct local networking to isolate 1 to 3 high-probability hunting properties before looking at a satellite map.
- Open your state Department of Natural Resources (DNR) or Fish and Game portal and pull the last 3 years of Public Harvest Reports, Hunter Success Rates, and Hunter Density Statistics.
- Filter for public Wildlife Management Areas (WMAs), national forests, or walk-in access tracts that rank in the top 25% for harvest per square mile, or show an antlered buck-to-doe harvest ratio tighter than 1:2.
- Cross-reference biological data with Local Networking (“Boot Leaking”): speak politely with rural mail carriers, county conservation officers, and agricultural coop workers. Ask a specific, non-threatening question: “Where are deer or elk crossing the county blacktop right before dark this month?” rather than “Where is your best hunting spot?”
- If targeting private land, enable the landowner overlay in onX Hunt ($34.99/year Single-State Premium) or HuntStand Pro ($34.99/year) to record parcel owner names and mailing addresses. Visit landowners in person between May and July wearing clean work clothes—never camo—to request written permission.
- Success Checkpoint: You’ll know it worked when you have narrowed a massive county or game management unit down to 2 or 3 specific public tracts or approved private parcels totaling 200 to 2,000 acres.
- Common Mistake: Trusting casual small-talk at local gas stations or archery shops. Resident hunters frequently give out intentionally misleading directions to protect personal honey holes. Verify all verbal tips against state biological harvest tables.
Step 2: Mark Funnels, Edges, and Bedding via E-Scouting
Drop digital waypoints on terrain funnels, habitat edges, food sources, and suspected bedding cover using desktop 3D software and mobile GPS apps.
- Open Google Earth Pro ($0) or CalTopo ($0) on a desktop monitor. Enable the Historical Imagery slider and toggle back 5 to 10 years to identify timber cuts (1–6 years old provide prime browse), burn scars, and seasonal swamp lines that are hidden under summer leaf canopies in default satellite views.
- Turn on the topographic contour layer (set to 20-foot or 40-foot intervals) in onX Hunt, HuntStand, or HuntWise ($30–$40/year for Pro tiers; $70–$170/year for Elite tiers).
- Scan the map and drop color-coded waypoints on four core features:
- Terrain Funnels (Pinch Points): Saddles (low dips along a continuous ridgeline), inside corners of agricultural fields, hour-glass timber necks narrowing to less than 75 yards wide, and steep ditch crossings where steep banks force animals onto a 10-yard flat lip.
- Edge Habitat (Transition Zones): Any boundary where two distinct vegetation types meet—such as tall hardwood timber meeting a brushy clear-cut, or cattail marsh meeting dry canary grass.
- Bedding Cover: South- or east-facing slopes in cold late-season weather (for solar warmth), north-facing benches in hot early-season weather (for shade), swamp hummocks, and leeward ridges at the upper 1/3 elevation line.
- Water Sources: Isolated stock tanks, spring seeps, or oxbow creek bends within 400 yards of thick cover.
- Success Checkpoint: You’ll know it worked when your digital map displays 8 to 12 clustered waypoint triads (Bedding + Transition Funnel + Food/Water) connected by logical terrain corridors within a 0.5-mile radius.
- Common Mistake: Dropping waypoints evenly across featureless, flat mature timber. Game animals rarely meander through wide-open woods during daylight; they follow the path of least resistance along structural edges and contour breaks.
Step 3: Engineer Scent-Free Access Routes and Offline Maps
Map wind-specific entry and exit trails for every digital waypoint and download offline map tiles to your smartphone before leaving home.
- Check the prevailing seasonal wind direction for your region using the HuntStand or onX Hunt wind overlay (e.g., prevailing WNW winds following cold fronts in October/November).
- Understand Thermal Draft Physics: as the sun heats the ground in the morning, air warms and rises uphill (up-thermal). Starting 45 to 60 minutes before sunset, cooling air becomes dense and flows downhill like water into creek bottoms (down-thermal).
- Draw custom line routes in your app from the parking lot to each waypoint so your scent stream blows away from both suspected bedding areas and approach trails. Use dry creek ditches, road cuts, or downwind ridge spines to mask your silhouette and footstep noise.
- Select Offline Maps in your GPS app, draw a 5-mile bounding box around your target property at High Resolution, and download the satellite and topo layers over Wi-Fi.
- Success Checkpoint: You’ll know it worked when every target waypoint has at least two dedicated access paths (e.g., a Northwest Wind Route and a Southwest Wind Route) and your map loads cleanly with your phone placed in Airplane Mode.
- Common Mistake: Walking straight across an open agricultural field in the dark before dawn or walking down the exact ridge trail the animals use to reach their beds. If game smells your boot tracks or catches your airborne scent on the walk in, the hunt is over before you climb a tree.
Phase 2: Low-Impact Observation
Step 4: Glass Open Edges and Travel Corridors from Afar
Observe natural animal movement during the first and last 90 minutes of daylight from distant vantage points using binoculars or a spotting scope.
- Arrive 30 minutes before legal sunrise or 2 hours before sunset at a perimeter road pull-off or an elevated bluff located 400 to 1,200 yards downwind of your e-scouted food sources, clear-cuts, or alpine meadows.
- Mount your 8×42 or 10×42 binoculars (or a 20-60x80mm spotting scope for Western basins) onto a pan-head tripod. Tripod mounting eliminates hand micro-tremors and reveals subtle ear twitches or antler tines in brush that handheld glass misses.
- Grid-scan the habitat edge in horizontal strips from left to right. Instead of looking for a whole animal, scan for horizontal backlines, the white flash of a throat patch or rump, or tips of antlers moving through goldenrod.
- When an animal emerges, drop a precise GPS pin on the exact gap in the fence line, timber corner, or coulee draw where it entered the opening, and record the exact timestamp and wind direction.
- Success Checkpoint: You’ll know it worked when you log the exact entry point and staging timing of target animals across 2 consecutive evenings without a single animal looking toward your vehicle or observation knob.
- Common Mistake: Glassing only the center of a bean field or meadow right at dark. Mature bucks and bulls staging inside the timber edge during legal shooting light often don’t step into open fields until 20 minutes after legal shooting hours; watch the shadowed staging zone 30 to 80 yards inside the woodline.
Phase 3: Boots-on-the-Ground Verification
Step 5: Walk Transition Zones to Read Tracks, Scat, and Sign
Walk the habitat edges and terrain funnels marked during e-scouting during midday hours (10:00 AM to 2:00 PM) to verify fresh tracks, scat, rubs, and scrapes.
Warning: Legal Boundary Safety: Always keep your GPS app open while walking timber near parcel edges. GIS property boundary overlays can carry a horizontal error margin of 10 to 40 feet depending on county surveyor data. Treat any purple paint mark, posted sign, or woven-wire fence as the absolute legal boundary over your phone screen.
- Wear knee-high rubber boots sprayed down with scent-eliminating enzyme spray, and check thermal air drift every 15 minutes by releasing a pinch of milkweed pappus (seeds) or a puff of wind-checker powder.
- Walk the seam where thick bedding cover meets open timber or crops, inspecting the ground for four primary diagnostic signs:
- Tracks: Measure length and examine edge sharpness. A fresh track (under 24 hours old) shows crisp, crumbling soil walls with zero leaf litter or dew spiderwebs inside the hoof print. Note splayed dewclaws and wider straddle widths, which indicate heavy-bodied mature males.
- Scat (Droppings): Step on or poke pellets with a stick. Fresh scat is dark, glossy, warm or soft inside, and emits a sharp musky odor. Hard, sun-bleached, chalky pellets are over 5 days old and reflect outdated movement.
- Rubs (Antler Bark Stripping): Measure the diameter of rubbed saplings and the height of the scar. Yearling bucks rub 1-to-2-inch flexible alders or pines; mature bucks (3.5+ years old) frequently rub stout 3-to-6-inch diameter trees at waist-to-chest height (30–42 inches) and leave deep gouges from brow tines. Note which side of the tree is stripped: the bare bark faces the direction the animal came from, pointing you toward its travel direction.
- Scrapes (Ground Pawings): Distinguish random single-use pawings from Primary Hub Scrapes. A true hub scrape is an oval patch of bare dirt (24–36 inches wide) cleared of all leaves directly beneath an overhanging licking branch sitting 48 to 60 inches off the ground with chewed or twisted tips.
- Success Checkpoint: You’ll know it worked when you confirm a convergence of 2 or more fresh sign types (e.g., glossy scat + shiny sap on a rub line + a freshly pawed hub scrape with hoof prints in the dirt) within a 40-yard pinch point.
- Common Mistake: Getting mesmerized by wide-open nighttime field scrapes. Nearly 85% of scrapes along open crop edges are visited strictly between 10:00 PM and 3:00 AM. Follow the rub line 75 to 150 yards back inside thick staging cover to find where the animal moves during legal daylight.
Step 6: Pinpoint Bedding Areas and Verify Daylight Funnels
Locate exact bedding impressions during post-season or early pre-season walks, or stop at the downwind perimeter edge if scouting within 3 weeks of opening day.
- Timing Split: If scouting in late winter/spring (February–April), walk directly into thick sanctuaries to map exact beds while snow or bare stems allow 100-yard visibility. If scouting in late summer or during the hunting season, stop 80 to 100 yards outside the thick bedding thicket and locate the exit trails instead.
- When inspecting bedding cover (swamp hummocks, blown-down treetops, or the upper 1/3 elevation of leeward ridges), look for oval depressions (36–45 inches long) pressed down to bare dirt or matted marsh grass, containing shed hair and concentrated piles of droppings.
- Stand or kneel inside the bed to see what the animal sees. Mature animals almost always bed with their back against heavy physical structure (a rock bluff, root ball, or impenetrable briar wall) looking downhill with the wind blowing over their shoulders from behind. This gives them scent protection behind them and visual protection in front of them.
- Follow the main beaten runway leading out of the bedding cover toward the nearest food source until terrain forces 2 or 3 faint trails to merge into a single heavily worn track inside a saddle, bench, or creek crossing.
- Success Checkpoint: You’ll know it worked when you stand at a terrain bottleneck 75 to 150 yards outside a confirmed bedding sanctuary where multiple faint trails fuse into one 12-inch-wide dirt trough showing multi-directional tracks.
- Common Mistake: Walking right into a mature animal’s bedroom two days before hunting it. Busting a big-game animal out of its primary security bed leaves lingering ground scent and frequently causes it to relocate 0.5 to 1.5 miles away or turn strictly nocturnal for 10 to 21 days.
Phase 4: Technological Monitoring & Final Setup
Step 7: Deploy Trail Cameras on Scraping Hubs and Pinch Points
Mount cellular or standard SD trail cameras at a 45-degree angle to verified funnels, water holes, or primary scrapes to capture 24/7 timestamps of animal movement.
- Choose your camera hardware based on property logistics:
- Cellular Trail Cameras ($60–$150 per unit + $5–$15/month data plan): Deploy on properties more than 30 minutes from home or near delicate bedding edges where foot traffic must be eliminated. Verify at least 2 bars of LTE signal on the camera’s internal meter before strapping it down.
- Standard SD Card Cameras ($30–$80 per unit): Deploy in deep backcountry canyons with zero cell coverage or along high-theft public trailheads.
- Select a sturdy 8-to-12-inch tree located 12 to 18 feet off the edge of the trail or scrape.
- Point the camera lens facing North (first choice) or South (second choice). Never point a camera directly East or West; rising and setting sunbeams trigger false motion events and white out images during prime dawn and dusk movement windows.
- Aim the camera at a 45-degree angle down the trail rather than 90 degrees perpendicular across it. A 45-degree angle keeps a walking animal inside the Passive Infrared (PIR) detection cone for 15 to 25 feet instead of 4 feet, eliminating empty photos of tails.
- Height & Angle Settings:
- Standard Setup: Strap the camera 36 to 42 inches (waist high) off the ground and shim the back with a stick so the lens is parallel to the slope of the ground.
- Public Land Anti-Theft Setup: Step onto a single climbing stick and mount the camera 72 to 96 inches (6–8 feet) high using a threaded tree screw mount angled downward at the target zone. Humans walk with their eyes at horizon level and rarely notice overhead cameras.
- Set the camera menu to 3-Photo Burst, 0.2-to-0.5-second trigger speed, and a 5-to-15-second recovery delay on trails (or a 1-to-2-minute delay over stationary scrapes or water troughs to avoid 500 photos of the same doe drinking). Clip every grass blade, fern, or overhanging twig within 10 feet of the lens.
- Success Checkpoint: You’ll know it worked when you walk down the target trail at a normal pace, trigger the test light (or receive an instant test photo via the cellular app), and confirm the frame captures your knees to your shoulders cleanly with zero brush blocking the center frame.
- Common Mistake: Checking SD card cameras every weekend out of excitement. Let standard SD cameras soak undisturbed for 14 to 21 days minimum. When you do swap cards, go during a midday rainstorm (which washes away ground scent immediately) and bring a spare formatted SD card so the swap takes less than 60 seconds.
Step 8: Select and Prep Ambush Sites for Prevailing Winds
Identify and mark 2 to 3 exact trees or natural ground blind pockets within effective shooting range of your confirmed funnel before leaving the area.
- Step 18 to 25 yards downwind (for archery) or 50 to 150 yards downwind (for firearms) of the exact spot where your camera or sign shows daylight convergence.
- Select an ambush tree that measures 12 to 20 inches in diameter with high back-cover—such as a fork trunk, adjacent cedar tree, or climbing vines—so your silhouette is broken up rather than sky-lined against an open canopy.
- Stand with your back against the trunk and locate 2 or 3 natural shooting lanes (18-to-24-inch gaps in the canopy) where an approaching animal’s head will pass behind a tree trunk (giving you cover to draw a bow or shoulder a rifle) before stepping into the clear opening.
- On private land (or public land where regulations explicitly allow minor trimming), clip only the minimum necessary thumb-thick twigs blocking your shooting window. Leave all heavy surrounding brush intact for cover.
- Drop a distinct “Stand Site” waypoint in your GPS app and note the exact wind directions required to hunt it safely (e.g., “Stand A: Hunt on NW, N, or W winds only; blows into creek ditch at 160° SE”).
- Success Checkpoint: You’ll know it worked when you can stand at your ambush point, verify clear shot windows to the trail, release a pinch of milkweed, and watch the white fluff float harmlessly into a dead zone where no animals approach.
- Common Mistake: Over-trimming a tree until it looks like a manicured city park. Mature animals know every shadow in their core home range; cutting a 10-foot highway through thick brush instantly puts them on alert and causes them to skirt around your setup.
Step 9: Synthesize Weather, Wind, and Camera Data into a Hunt Log
Correlate trail camera timestamps with barometric pressure, temperature drops, and wind directions in a digital scouting log to select your exact opening-day stand.
- Import your trail camera photos into HuntStand’s Trail Camera Management tool or log them in a spreadsheet alongside historical weather data.
- Filter only for photos or glassing sightings occurring within legal shooting hours (30 minutes before sunrise to 30 minutes after sunset) or within 30 minutes of those edges. Ignore 2:00 AM photos; an animal photographed at 2:00 AM is often 0.75 miles away by dawn.
- Look for repeating weather triggers across daylight sightings:
- Barometric Pressure: Daylight movement surges when barometric pressure rises rapidly above 30.10 to 30.30 inHg immediately following a rain front.
- Temperature Drops: Look for a 10°F to 15°F drop below the 7-day rolling average temperature.
- Wind Alignment: Note whether a mature animal only uses Trail A when the wind blows out of the North-Northwest (giving it a cross-wind advantage as it exits bedding).
- Rank your scouted locations into A-Spots (save exclusively for high-odds cold fronts with perfect wind) and B-Spots (observation edges for marginal temperatures or swirling winds).
- Success Checkpoint: You’ll know it worked when you can look at the 3-day weather forecast before your hunt and immediately know which specific waypoint to walk into, which access route to follow in the dark, and what 90-minute window the animals are most likely to pass through.
Common Mistakes and How to Fix Them
Even experienced hunters misread sign or pressure a property. Use these recovery protocols if your scouting hits a wall:
1. You Busted a Mature Animal Out of Its Bedding Area
- The Cause: Pushing too deep into thick cover with a tail-wind or swirling thermal during late-summer or in-season scouting.
- The Fix: Do not chase the animal or drop a camera right on the bed. Immediately back out the way you came. Rest that specific 80-acre pocket for at least 10 to 14 days. When you return to hunt it, set up 150 to 200 yards further downwind along the secondary escape cover—pressured animals often hold 50 to 100 yards deeper in the thicket and reach the old funnel 30 minutes later in the evening.
2. Your Trail Camera Shows 100% Nocturnal Pictures (Midnight to 4:00 AM)
- The Cause: Your camera is hung on a destination food source (like an open soybean field or bait site) where mature animals don’t arrive until long after dark.
- The Fix: Use the camera timestamp as a distance gauge. A whitetail buck or bull elk traveling to feed typically moves 100 to 200 yards every 30 minutes during its evening staging progression. Pull the camera off the field edge and move it 200 to 400 yards back up the primary trail toward the thickest bedding cover until the timestamps shift into legal daylight.
3. Late-Summer Patterns Vanish Overnight in Early October (“The October Shift”)
- The Cause: Two biological changes happen simultaneously in late September/early October: velvet sheds (breaking up bachelor groups and lowering testosterone tolerance) and foliage drops while hard mast (white and red acorns) begins falling in the timber.
- The Fix: Abandon open agricultural green fields immediately. Take a midday scouting walk looking straight up into the canopy of White Oak (Quercus alba) ridges with binoculars. Find trees actively dropping acorns where leaves on the forest floor are torn up and littered with fresh green acorn caps; set up right on the downwind edge of that oak flat.
4. Public Land Parking Lots Are Packed with Other Trucks on Opening Morning
- The Cause: Scouting the same obvious 400-yard zone off road access points and gentle ridge trails that every other e-scouter spotted on their app.
- The Fix: Pivot from hunting food and terrain to hunting human pressure. While e-scouting, mark two overlooked sanctuaries: (a) Overlooked Micro-Pockets within 150 yards of the parking lot (thick briar ditches or wet islands that hunters walk right past in the dark with headlamps on), and (b) Barrier Crossings that require chest waders, a kayak, or climbing a 300-foot vertical bluff. Set up on the escape corridors connecting the crowded public trails to those thick sanctuaries by 7:30 AM, when other hunters begin walking around and pushing game toward you.
5. Smartphone GPS Dies or Loses Position in Deep Timber
- The Cause: Running background apps and continuous cellular tower pinging while using GPS mapping apps in cold weather.
- The Fix: Before leaving your truck, switch your phone to Airplane Mode (your phone’s internal GPS chip still tracks satellites perfectly without cell service as long as offline maps are downloaded). Keep the phone inside an interior fleece pocket next to your body heat, and keep a 10,000mAh power bank plugged in inside your pack.
Process Variations by Hunting Scenario
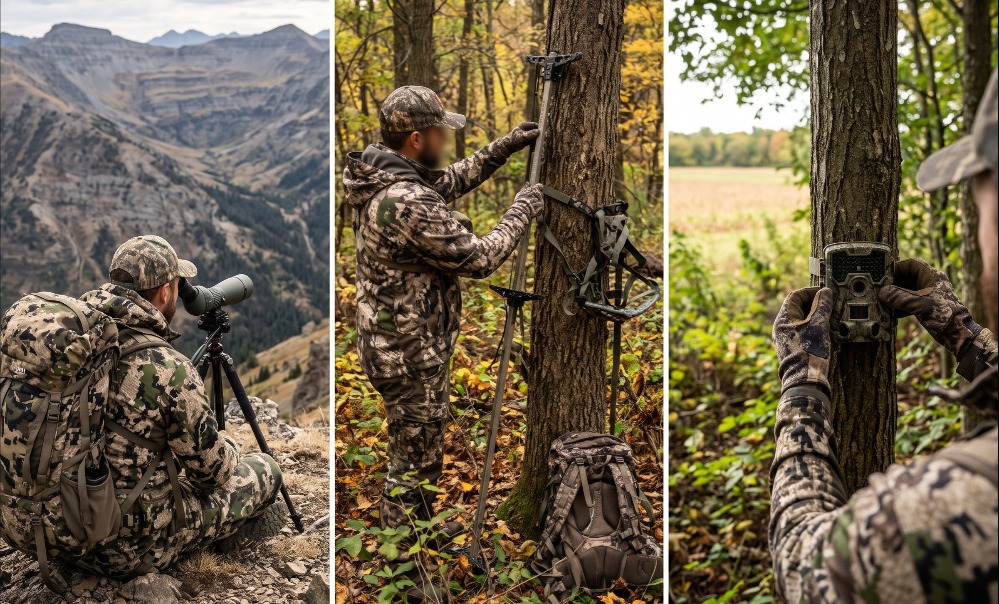
Adjust the 9-step process above to match your specific terrain, legal framework, and target species:
Variation 1: Out-of-State & Western Backcountry Hunts (Elk & Mule Deer)
When you live 1,000 miles from your unit and cannot walk the ground until 48 hours before opening day:
- Skip Steps 5–8 in pre-season. Spend 80% of your preparation time in Steps 1 and 2 using Google Earth Pro and onX Elite.
- Create a Plan A, Plan B, and Plan C drainage system separated by at least 3 to 5 miles so forest fires, road closures, or heavy outfitter camps in Drainage A don’t ruin your trip.
- Focus heavily on Step 4 (Long-Distance Glassing). Spend your first 2 days in-state perched on high glassing knobs at 8,000–11,000 feet elevation at dawn and dusk, locating herds from 1 to 2 miles away with a spotting scope before ever burning boot leather hiking into a basin.
Variation 2: High-Pressure Public Land Run-and-Gun (“In-Season Scouting”)
When hunting pressured public properties where pre-season camera soaking is prohibited or leads to gear theft:
- Combine Steps 5, 6, and 8 into a single afternoon execution.
- Pack a lightweight mobile setup (a 12-pound climbing tree saddle or a 9-pound hang-and-hunt lock-on stand with 3-to-4 climbing sticks) on your back at 11:00 AM.
- Walk downwind transition edges until you cross piping-hot sign made that morning—bright yellow/white sap weeping on tree rubs, steaming droppings, or tracks on top of morning rain drops. Set up on that exact spot immediately and hunt it that very afternoon; first-time sits on fresh sign carry the highest statistical odds of harvesting a mature animal.
Variation 3: Small Private Parcel Management (20 to 80 Acres)
When scouting a small private tract where one wrong step pushes the resident animals onto the neighbor’s farm:
- Designate the center 30% of the property as a zero-entry Sanctuary—never walk through it, shed hunt it, or check cameras inside it during the fall.
- Rely entirely on Perimeter Cellular Trail Cameras (Step 7) mounted along perimeter fence jumps, food plot edges, and creek crossings facing inward so you can monitor inventory from your couch without laying down a single boot track inside the timber.
How Long Does It Take & What Does It Cost?
| Scouting Phase / Method | Time Required | Typical Cost Range | Primary Value |
| State Data & Networking | 2–4 hours | $0 (Free) | Prevents wasting a season on low-density public tracts |
| Digital E-Scouting | 3–5 hours per property | $0 (Free) to $34.99–$99.99/yr | Eliminates 80% of unproductive ground from home |
| Long-Distance Glassing | 2–3 hrs per dawn/dusk sit | $200–$2,000+ (One-time optics) | Confirms live daylight inventory with zero scent pressure |
| Boots-on-the-Ground | 4–8 hours per 500 acres | $0 (Excludes fuel & boots) | Verifies micro-topography, current mast crops, and fresh sign |
| Trail Camera Monitoring | 1–2 hrs setup + 14–30 day soak | $30–$150/cam (+ $5–$15/mo cell) | Pinpoints exact daylight time windows and wind preferences |
Frequently Asked Questions
What is the best month of the year to scout hunting locations?
Late February through early April (immediately after the season closes) is the single best window for physical, boots-on-the-ground scouting. Foliage is down, last fall’s rubs and scrapes are still glaringly visible, snow or mud reveals primary travel highways, and you have 6 months for your human scent to vanish before opening day.
How close to opening day is too late to walk a hunting property?
Avoid walking deep into core bedding areas within 21 days of opening day unless you have a bow or firearm in your hands ready to hunt. If you must scout within 2 weeks of your hunt, restrict yourself to perimeter glassing from a vehicle or walking strictly along outer field edges during a midday rainstorm.
Are drones legal to use for scouting hunting locations?
In almost all US states and Canadian provinces, using a drone (UAV) to locate game or scout during open hunting seasons is strictly illegal under Fair Chase statutes, carrying heavy fines and license revocation. Off-season drone mapping of private agricultural habitat is legal in some states, but federal Wilderness Areas and most state WMAs ban drone takeoffs year-round. Always verify state DNR regulations first.
How many trail cameras do I need per 100 acres?
Deploy 2 to 3 trail cameras per 100 acres for reliable coverage. Rather than scattering cameras randomly across the timber, focus one camera on a primary destination food source (for inventory) and relocate the other two cameras across terrain funnels and primary scrape hubs until you isolate a daylight corridor.
How do I tell a buck track from a doe track when scouting?
Ignore dewclaw marks in soft mud—any heavy doe leaves dewclaw imprints in wet soil. Instead, inspect straddle width and toe alignment on firm dirt trails: mature bucks have wider chests that create a wider left-to-right straddle, walk with their toes slightly splayed outward, and frequently drag their rear hooves in snow or leaf litter.
Mastering how to scout hunting locations requires trading aimless woods-walking for disciplined verification. When you combine macro state harvest data, 3D topographic e-scouting, scent-conscious ground sign forensics, and strategic trail camera placement, you eliminate 90% of dead water before the season opens—putting yourself in the right tree, on the right wind, when a target animal moves in daylight.