
Learning how to use trail cameras lets you monitor wildlife patterns and property security 24/7 without spooking game. Across eight steps-covering hardware selection, memory formatting, menu programming, corridor selection, North/South mounting, brush clearing, angle calibration, and low-impact retrieval-setup takes 30 minutes for beginners, where success depends on aligning the Passive Infrared (PIR) sensor with travel angles.
Before You Start: Setup Overview & Checklist
- Time Required: 15 minutes (at-home prep) + 15 minutes (in-field installation)
- Difficulty Level: Beginner
- Typical Cost: $45–$260 total ($25–$230 for the camera, $10 for an SD card, $15–$20 for lithium batteries, plus $0–$15/month for optional cellular data)
- Tools & Materials Checklist:
- 1x Trail Camera: Traditional SD, Cellular 4G/LTE, Short-Range Wi-Fi/Bluetooth, or Solar-Integrated unit.
- 8x to 12x AA Energizer Ultimate Lithium Batteries: Required for stable 1.5V output in sub-freezing temperatures (avoid standard alkalines).
- 2x Class 10 (U1 or U3) SDHC Cards (16GB or 32GB): Two cards allow instant field swapping. Avoid 64GB+ SDXC cards unless your manual explicitly supports exFAT file systems.
- 1x Compass or Smartphone Compass App: For verifying true North or South lens orientation.
- 1x Pair of Bypass Pruning Shears: For clearing foreground vegetation.
- 1x Pair of Nitrile Gloves & Scent-Eliminating Spray: To prevent transferring human skin oils to the camera housing.
- 1x Adjustable Screw-In Tree Mount or 6-Foot Nylon Strap: Included with most cameras; steel security boxes and 5/16-inch python cable locks are recommended for public land.
- Prerequisites & Regulatory Checks: Before deploying hardware, verify state wildlife codes via your state wildlife agency or the Congressional Sportsmen’s Foundation. Several western jurisdictions (including Arizona, Utah, and Nevada) restrict or ban trail cameras—especially cellular and wireless transmitting models—during active hunting seasons or within specific distances of waterholes.
Phase 1: Hardware Prep and Pre-Field Configuration
Step 1: Select Your Camera Architecture and Flash Type
Match your trail camera hardware and infrared wavelength to your property access frequency, canopy cover, and target species sensitivity. Choosing the wrong transmission type or flash spectrum either drains your wallet in unnecessary subscriptions or spooks mature wildlife on the very first night capture.
Use the specifications below to select the right camera category and night illumination system before heading to the woods:
| Camera Category | Hardware Price | Ongoing Cost | Core Pros | Core Cons | Best Suited For |
| Cellular (4G/LTE) | $60–$180 | $5–$15/mo per camera | Near real-time app transfers; leaves zero human ground scent; AI species tagging | Requires min. 2 bars LTE signal; monthly fees; higher battery drain | Private property, remote stands, perimeter security, low-intrusion buck scouting |
| Traditional SD Card | $25–$90 | $0 | Zero subscription fees; 6–12 month battery life; operates without cell service | Manual retrieval leaves human scent and delays scouting data | Public land, dead-zone canyons, tight budgets, off-season herd surveys |
| Integrated Solar / Dual-Power | $120–$230 | $0 (or $5–$15/mo with LTE) | Near-infinite battery life via 12V/lithium solar panel; handles heavy video loads | High upfront cost; requires direct southern sky exposure | Set-it-and-forget-it spots, food plots, year-round boundary surveillance |
| Short-Range Wireless (Wi-Fi/BT) | $45–$100 | $0 | Zero monthly fees; download media within 30–50 ft without touching housing | Requires walking within 50 ft of site; slow pairing in dense foliage | Backyard acreage, drive-by farm lanes, cameras locked 10 ft up in security boxes |
Next, confirm your camera’s LED array matches your scouting target:
- No-Glow (Black IR LEDs, 940nm): Emits infrared light completely invisible to humans and game within a 60–80 ft range. Produces slightly grainier monochrome night photos, making it essential for pressured public hunting grounds, core bedding perimeters, and theft-prone security zones.
- Low-Glow (Red IR LEDs, 850nm): Projects a crisp 80–100+ ft night flash with high black-and-white contrast, but reveals a faint red glow directly at the diode array. Best for open field edges and wide logging cuts where animals are 30+ feet away.
- White Flash (Incandescent/Xenon): Fires a visible daylight-balanced burst for full-color night photos and video. Because it spooks pressured deer and alerts trespassers, reserve it for scientific species research, non-pressured predator monitoring, or gated driveways.
You’ll know it worked when: Your selected camera powers on at your workbench, and cellular models display at least two bars of 4G/LTE signal strength inside your companion mobile app during home pairing.
Common mistake: Buying a cellular camera without checking carrier tower coverage at the exact GPS drop pin, leaving the camera stuck in an infinite “searching for network” loop that kills 8 AA batteries in 48 hours.
Step 2: Install Lithium Batteries and Format the SD Card
Load fresh 1.5-volt AA lithium batteries into the tray and run the internal SD card format utility before leaving home. Put on a pair of disposable nitrile gloves before handling the housing so you do not bake human scent into the plastic latches.
- Open the camera latches and insert 8 to 12 AA lithium batteries, matching the positive (+) and negative (-) polarity markings inside the sled.
- Navigate to the camera’s system menu and set the Battery Type parameter to Lithium (if equipped) so the onboard voltage meter calculates remaining capacity accurately.
- Insert a Class 10, 16GB or 32GB SDHC card into the slot until it clicks into place (gold contact pins facing the rear housing on most models).
- Toggle the power switch to Setup/On, select Format SD Card from the settings menu (or hold the dedicated Format button on cellular units for 5 seconds), and confirm. This writes a clean FAT32 directory structure and erases hidden system files left by computers or other camera brands.
- For cellular cameras, scan the QR code inside the door using the manufacturer’s smartphone app, trigger a manual test photo, and wait 60–90 seconds for the image to appear on your phone.
You’ll know it worked when: The LCD screen displays 0000 photos taken with 99%+ free capacity, the status LED flashes green during the test shot, and zero card-read errors appear.
Common mistake: Formatting an SD card on an Apple MacBook or Windows PC instead of inside the trail camera, which leaves hidden .Spotlight or partition files that cause the camera to freeze mid-deployment.
Step 3: Program Capture Mode, Trigger Delay, and Seasonal Settings
Configure your capture mode, multi-shot burst count, and PIR recovery delay to match your specific terrain feature and seasonal phase. Using a single default setting year-round will either fill a 32GB card in 6 hours with photos of the same raccoon at a feeder or miss a rutting buck trotting past a narrow pinch point.
Set your timestamp, camera ID name, and PIR sensitivity to Medium (use High when ambient temperatures exceed 80°F, and Low when temperatures drop below 32°F). Then configure your capture intervals using this seasonal matrix:
| Seasonal Phase | Target Terrain & Placement | Recommended Capture Settings | Strategic Objective |
| Summer / Early Pre-Season | Ag field edges, clover food plots, water sources, mineral stations | Picture mode, 3-shot burst, 30–60s delay | Herd inventory and velvet antler development tracking |
| Early Fall / Transition | Inside timber edges, primary travel funnels, dropping oak ridges | Photo + Video hybrid mode, 10–15s delay | Track shifts from summer fields into acorn feeding and cover |
| Pre-Rut & Rut | Community scrapes, pinch points, doe bedding fringe travel | Video (15–20s) or fast 3-shot burst, 0–5s delay | Identify cruising daylight bucks and active breeding movement |
| Late Season / Winter | Standing grain, late-season food plots, sunny south-facing draws | Time-lapse (evenings) or PIR photo mode, 1–5m delay | Locate remaining herd survivors seeking thermal shelter and calories |
As a rule of thumb for stationary Feeding & Mineral Sites, set trigger delays between 1 and 5 minutes so feeding herds do not burn out your storage and batteries. On Travel Trails & Funnels, set delays between 0 and 5 seconds with a 3-shot burst (spaced 1 second apart) to catch fast-walking animals.
You’ll know it worked when: The home status screen shows your custom Camera ID, exact local 24-hour time, and your chosen delay interval before entering sleep countdown.
Common mistake: Leaving a cellular camera on a 5-second delay with 1080p video transmission over an active mineral lick, which exhausts a monthly 500-photo data plan in a single afternoon.
Phase 2: Site Selection and Physical Mounting
Step 4: Locate the Travel Corridor and Orient North or South
Position your camera 12 to 15 feet off the edge of the target trail, facing True North or True South. Direct eastern or western sun exposure blinds the optical sensor during golden hour—the exact 60-minute window when crepuscular wildlife movement peaks—and heats the PIR lens, causing non-stop false triggers.
- Identify a high-probability focal point such as a creek crossing, fence gap, brush funnel, or active scrape line.
- Select a sturdy living tree at least 8 to 10 inches in diameter located 12 to 15 feet away from the center of the trail. Trees thinner than 8 inches sway in 10 mph winds, sweeping the PIR detection cone across warm ground and triggering thousands of empty frames.
- Open your compass app and stand with your back against the trunk, facing the trail. Confirm your line of sight points within 30 degrees of North (0°) or South (180°). North is the gold standard in the Northern Hemisphere because the sun tracks across the southern sky, keeping the lens in perpetual shade.
You’ll know it worked when: Your compass bearing along the camera’s sightline reads between 330°–030° (North) or 150°–210° (South), and the tree trunk remains rigid when you push against it firmly.
Common mistake: Strapping a camera to a 4-inch sapling facing due East (90°), resulting in 1,200 whited-out sunrise photos and a dead battery pack within a week.
Step 5: Mount the Camera at the Optimal Height and Trail Angle
Strap the camera housing to the trunk so it aims across the trail at a 20- to 45-degree angle, never perpendicular (90 degrees). Every trail camera has a PIR detection cone and a trigger wake-up time (0.2 to 0.8 seconds); aiming straight across a narrow path gives a walking animal less than 4 feet of horizontal space inside the trigger zone, producing blurry photos of hooves and tails.
Choose one of two vertical mounting profiles based on human traffic in the area:
- Standard Scouting Setup (Low Theft Risk): Mount the camera 2.5 to 3.5 feet (30 to 42 inches) off the ground—roughly waist-to-chest height. This aligns the horizontal PIR Fresnel lens directly with an adult deer’s torso and vitals.
- Theft-Deterrence Setup (Public Land / High Traffic): Step up onto a single climbing stick and mount the camera 8 to 10 feet high on the trunk. This elevates the housing well above human eye level and out of a deer’s direct peripheral vision.
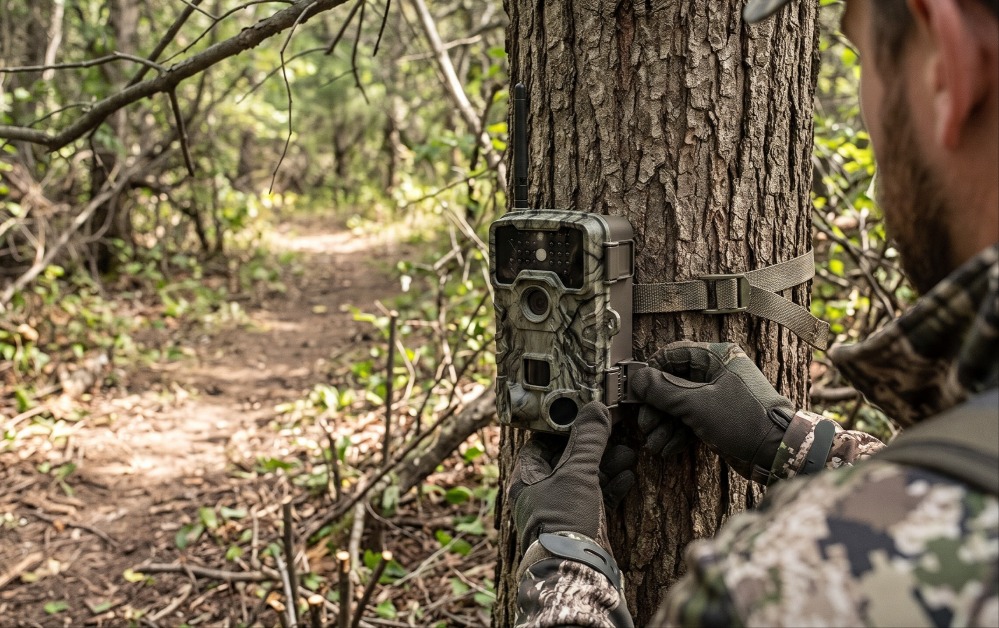
Thread the nylon strap through the rear housing eyelets, wrap it around the trunk, and cinch the cam buckle tight with at least 20 lbs of tension so bark crevices grip the rear cleats.
You’ll know it worked when: You try to twist the camera housing left or right with one hand and it does not shift on the bark, and your lens points diagonally up or down the trail at a 20°–45° angle, viewing at least 20 linear feet of the path.
Common mistake: Mounting the camera 5 feet high (human eye level) aimed at a 90-degree angle across a run, which advertises the camera to thieves while missing the front half of every trotting buck.
Step 6: Clear All Foreground Brush Within 20 Feet
Cut down all tall grass, weed stalks, and overhanging limbs in a fan-shaped zone extending 15 to 20 feet in front of the camera lens. A trail camera’s PIR sensor does not detect motion directly; it detects changes in infrared heat signatures moving across its segmented zones. Sun-warmed leaves or goldenrod stalks blowing in a 15 mph breeze register as moving heat targets, firing the shutter every few seconds.
- Walk a 20-foot arc from the tree trunk out past the target zone on the trail.
- Use bypass pruning shears to snip saplings, briars, and tall grass down to below 6 inches high inside the entire field of view.
- Look up and trim back low-hanging evergreen boughs or oak branches within 6 feet of the lens. Even if a branch doesn’t trigger the PIR during the day, the infrared flash will reflect off nearby leaves at night, whiting out the image (IR blowback) and blinding the sensor to animals standing 15 feet behind the branch.
- For solar-integrated cameras, clear a small canopy window directly south of the top-mounted solar panel so it receives at least 3 to 4 hours of direct midday sunlight.
You’ll know it worked when: You crouch behind the camera housing, sight along the lens barrel out to 25 feet, and see an unobstructed tunnel of air with zero leaves, twigs, or grass tips intersecting the frame.
Common mistake: Clearing brush at noon in early May and forgetting that summer weeds grow 3 feet in two weeks—resulting in 10,000 photos of a single milkweed stalk by June.
Phase 3: Aiming Calibration, Arming, and Retrieval
Step 7: Calibrate the Vertical Aim Using Walk-Test Mode
Insert a wooden wedge or use an adjustable gimbal bracket to tilt the camera housing until the internal Walk-Test LED blinks exactly at knee-to-chest height along the trail. Tree trunks rarely grow perfectly vertical, and high mounts (8–10 feet up) will shoot straight over an animal’s back unless angled downward precisely.
- Switch the camera into Test / Setup Mode (most cameras activate a flashing red or green LED behind the front PIR window whenever motion/heat is detected).
- Slip a thumb-thick dead branch, pine cone, or composite shim between the top back edge of the camera housing and the tree trunk to tilt the lens downward (or behind the bottom edge if the tree leans forward).
- Walk out to the exact spot on the trail where you expect animals to pass (15 to 25 feet away).
- Wave your hand at waist level (3 feet off the ground) and watch the front of the camera.
- Adjust the thickness of the wooden wedge behind the camera until the red test light flashes reliably every time your torso crosses the trail centerline.
- Wipe down the outer housing and strap with a rag misted in scent-eliminating spray, verify no bark crumbs are trapped on the rubber door gasket, latch the housing shut, and flip the switch to Armed / On. Walk away behind the tree out of the lens cone.
You’ll know it worked when: The red Walk-Test indicator light flashes rapidly as you cross the trail 20 feet away at waist height, and stops flashing when you crouch below 12 inches or stand 35 feet to the side.
Common mistake: Guessing the downward angle on an 8-foot high mount without running the Walk-Test, which usually points the narrow 10-degree vertical PIR detection ribbon into the dirt just 6 feet in front of the tree.
Step 8: Execute a Low-Impact Card Swap and Scent-Free Check
Check traditional SD cameras only during midday hours (11:00 AM to 2:00 PM) ahead of falling rain or a favorable wind, swapping the full SD card for a pre-formatted spare in under 60 seconds. Mature game animals can smell human boots and skin oils on brush for 48 to 72 hours; lingering at a camera site during dawn or dusk ruins the location you are trying to scout.
- Wear rubber knee boots and nitrile gloves on your approach, walking a direct entry and exit path that does not cross the deer trail being monitored.
- Open the camera door, switch the power to Off, and wait 3 seconds for any active file-write operations to finish.
- Eject the full SD card, drop it into a labeled protective case, and insert your blank, pre-formatted spare SD card.
- Check the battery meter on the LCD screen (replace all batteries if voltage drops below 60%) and inspect the lens glass for spiderwebs or mud spots.
- Flip the switch back to On, latch the door, and leave the area immediately—review your captured footage at home or in your truck using an OTG smartphone SD card reader rather than standing at the tree.
You’ll know it worked when: You complete the entire approach, card swap, battery check, and departure in under 90 seconds at the tree, and subsequent captures show wildlife returning to the trail that same evening without blowing or staring at the tree trunk.
Common mistake: Ejecting the SD card while the camera power switch is still set to On, which can corrupt the file allocation table (FAT32) and erase every photo on the card.
Common Mistakes and How to Fix Them
Even experienced users run into blank cards, white-out night frames, or dead battery trays. Use this troubleshooting guide to diagnose and fix the five most common trail camera failures:
- Failure Mode 1: Thousands of Blank Photos with No Animals Visible
- Root Cause: Either sun-heated vegetation is moving within 20 feet of the lens, the camera faces East/West into direct sunlight, or the camera is strapped to a thin tree swaying in the wind. On rare occasions, a slow trigger speed (>1.0s) paired with a 90-degree trail angle causes animals to walk completely out of the frame before the shutter fires.
- How to Fix It: Relocate the camera to a tree at least 10 inches thick facing North, shear all grass and overhanging limbs within a 20-foot arc, angle the camera 30 degrees down the trail, and drop PIR sensitivity from High to Medium.
- Failure Mode 2: Night Photos Are Completely White (Overexposed) or Pitch Black
- Root Cause: White-out photos occur when a stray twig, leaf, or tree trunk sits within 4 feet of the infrared LED array, bouncing the IR flash back into the auto-exposure sensor. Pitch-black night photos occur when standard alkaline batteries drop below 1.25V in cold weather—enough voltage to trip the shutter, but not enough amperage to fire the IR LED array.
- How to Fix It: Trim back any bark ridges or branches near the front edges of the housing, and swap all alkaline batteries for 1.5V Energizer Ultimate Lithium cells.
- Failure Mode 3: SD Card Error, Locked Card, or Unreadable Files
- Root Cause: The physical write-protect tab on the left side of the full-sized SD card slid down during insertion, or an oversized 64GB/128GB SDXC card formatted in exFAT was inserted into a camera that only reads FAT32 (32GB max).
- How to Fix It: Slide the tiny plastic lock switch on the side of the SD card upward toward the gold pins, switch to a standard 16GB or 32GB Class 10 SDHC card, and run the in-camera Format function.
- Failure Mode 4: Cellular Camera Captures to the SD Card But Stops Sending to the App
- Root Cause: Summer foliage growth (heavy wet leaves attenuate 4G LTE radio waves) dropped your signal below 1 bar, or internal battery voltage dipped below the 70% threshold required to power the high-draw cellular modem.
- How to Fix It: Screw on a long-range omnidirectional external cellular booster antenna mounted 6 feet higher up the trunk, verify your monthly data tier hasn’t hit its cap, and attach an external 12V solar lithium power pack.
- Failure Mode 5: Moisture Fogging Inside the Lens or Ant Infestation
- Root Cause: Pine needles or dirt compromised the rubber door gasket, or ants crawled through the bottom external 12V DC barrel jack seeking warmth produced by the circuit board.
- How to Fix It: Bring the camera indoors and place it in an open zip-top bag with two silica gel desiccant packets for 24 hours. Clean the rubber O-ring channel with a cotton swab, plug unused DC ports with their rubber dust caps, and spray permethrin insect repellent on the tree bark 6 inches around (never directly on) the camera housing.
Variations for Different Environments and Setups
1. Public Land and High-Pressure Security Setups
When deploying on public hunting land or monitoring property borders for trespassers, stealth overrides convenience. Use a Traditional SD or Cellular camera with a 940nm No-Glow Black IR flash—never Low-Glow or White Flash. Pack a single climbing stick, mount the camera 9 to 10 feet high, and lock it inside a custom-fitted 16-gauge steel bear/security box lagged or cable-locked to the tree. Break up the rectangular silhouette of the box by tucking 2 or 3 artificial silk oak leaves under the mounting strap edges (keeping them well clear of the lens and PIR window).
2. Open Agricultural Fields and Food Plots (No Trees Available)
When monitoring the center of a clover plot, standing bean field, or desert waterhole with no trees nearby, avoid wood fence posts that cattle or elk rub against. Drive a 6-foot heavy-duty steel T-post 18 inches into the soil until rock-solid, and attach a threaded T-post trail camera mount clamp. Because open fields lack tree cover to stop the PIR sensor from picking up heat waves 80 feet away, program the camera to Field Scan / Time-Lapse Mode: set it to automatically snap 1 photo every 5 minutes during the first two hours after dawn and the last two hours before dark, while retaining normal PIR motion triggers for animals walking within 30 feet.
3. Extreme Sub-Zero Winter Deployments
When temperatures plunge below 0°F (-18°C), standard chemical battery reactions slow dramatically and cold air reduces the thermal contrast between an animal’s winter coat and the background. Switch the camera’s internal PIR Sensitivity to Low or Normal (counterintuitively, cold ambient air makes warm animals stand out more sharply to an infrared sensor, so High sensitivity can cause false triggers from snow flurries). Run exclusively AA Lithium batteries paired with an external 12V solar lithium pack angled at 45 degrees toward the southern horizon, and smear a tiny drop of silicone grease along the rubber door gasket so ice cannot freeze the latch shut.
Frequently Asked Questions
How long do trail camera batteries actually last in the field?
A set of 8 AA lithium batteries lasts 6 to 12 months in a traditional SD card camera taking 50 daytime/nighttime photos per day, or 2 to 4 months in a cellular camera transmitting once daily. Using video mode, instant cellular transmission, or standard alkaline batteries in freezing weather cuts lifespan to 2–4 weeks.
Do deer and wildlife notice trail cameras?
Yes, mature whitetails and predators detect trail cameras via human scent left on the housing, ultrasonic electronic capacitor whine, and visible LED glow. Switching to a 940nm No-Glow flash, mounting the camera 8–10 feet high angled downward, and handling the unit exclusively with nitrile gloves eliminates 95% of negative game reactions.
What is the best SD card size and speed for a trail camera?
A 16GB or 32GB Class 10 (U1) SDHC card from a reputable brand like SanDisk or Lexar is ideal for 99% of trail cameras. Avoid 64GB, 128GB, or microSD cards in adapters unless required by the manufacturer, as larger SDXC cards use exFAT formatting that causes older camera firmware to lock up.
Can you use a cellular trail camera without a monthly subscription plan?
Yes. Almost every cellular trail camera on the market functions as a standard traditional trail camera if you pause or cancel the monthly cellular data plan, saving all photos and videos directly to the internal SD card. Additionally, brands like Moultrie, Spypoint, and Tactacam offer seasonal pause options or limited free monthly photo tiers.
Why does my trail camera take pictures during the day but not at night?
When a trail camera captures daytime photos normally but stops recording at night, your batteries have dropped below the amperage threshold required to fire the infrared LED array. Replace all batteries immediately with fresh 1.5V AA lithium cells and change the internal menu battery setting from Alkaline to Lithium.
Learning how to use trail cameras comes down to disciplined preparation at home and strict adherence to thermal physics in the woods. By formatting your SD card in-camera, orienting your lens North or South at a 20- to 45-degree angle to the trail, clearing a 20-foot foreground zone, and verifying your aim with the Walk-Test LED, your very first deployment will deliver crisp, actionable wildlife intelligence all season long.