
Knowing how to choose hunting binoculars comes down to executing seven sequential steps: matching magnification to terrain, sizing the objective lens for dawn exit pupils, selecting a sealed prism chassis, verifying optical coatings, measuring facial fit, stress-testing edge clarity, and calibrating the diopter. The process takes 45 minutes and hinges primarily on prism glass quality over raw magnification.
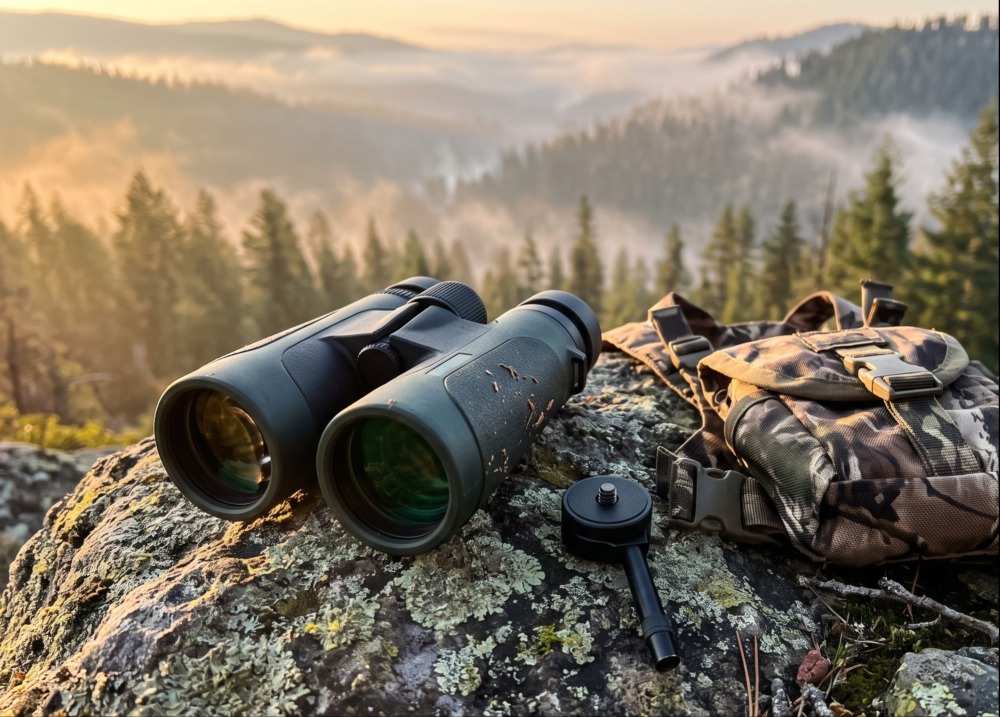
Before You Start
- Time Required: 45–60 minutes (15 minutes for spec filtering + 30 minutes for hands-on optical testing and calibration).
- Difficulty Level: Beginner-friendly (requires zero prior optics knowledge).
- Typical Cost Range: $150–$3,500+ ($250–$800 for a lifetime mid-range hunting setup, plus $80–$150 for an enclosed chest harness).
- Tools & Materials Checklist:
- [ ] Millimeter ruler (to measure your interpupillary distance from 55mm to 75mm).
- [ ] Your hunting eyeglasses or prescription sunglasses (if worn afield).
- [ ] A high-contrast test target at 50–100 yards (a license plate, fine bark texture, or overhead power line against a bright sky).
- [ ] Kitchen digital scale (optional, to verify true unit weight in ounces).
- Prerequisite Conditions: Define your primary hunting engagement distance (under 150 yards in timber vs. 300+ yards in open basins) and whether you pack your gear on multi-day backcountry hikes.
Phase 1: Match Optical Specs to Your Hunting Terrain
Step 1: Calculate Your Target Magnification and Field of View by Terrain
Select an 8x, 10x, or 12x–15x magnification rating based on your average spotting distance and required Field of View (FOV) at 1,000 yards.
Look at the two primary numbers stamped on the binocular hinge or focus wheel (such as 8×42 or 10×50). The first number is magnification—an 8x binocular makes a deer at 400 yards appear as if it is 50 yards away. As magnification increases, your linear Field of View (the horizontal width of the landscape visible at 1,000 yards) narrows, and hand tremors amplify. Match your primary hunting zone to these exact specification thresholds:
- Dense Timber, Whitetail Tree Stands, and Brush (Under 200 Yards): Choose 8x magnification with a minimum FOV of 350 to 420 feet at 1,000 yards. The wide viewing cone lets you track moving game through thick branches without losing the animal in your frame, and the 8x power masks shivering hands on cold mornings.
- Mixed Country, Ag Fields, and Western Spot-and-Stalk (200 to 600 Yards): Choose 10x magnification with a minimum FOV of 300 to 340 feet at 1,000 yards. This provides 25% more detail than 8x for counting antler tines across canyons while remaining steady enough to hold by hand against your brow bone.
- Open Plains, Desert Basins, and Alpine Glassing (600+ Yards): Choose 12x or 15x magnification (FOV of 220 to 275 feet at 1,000 yards). Warning: Never buy 12x or 15x binoculars for freehand use; your heartbeat and breathing will cause violent image jitter that induces nausea and hides bedded game. Only select 12x+ if you carry a tripod.
You’ll know it worked when: You can hold the binoculars up with one hand in a standing position for 30 seconds and read a sign 100 yards away without the letters bouncing across the lens.
- Common Mistake: Buying 12x binoculars thinking “more power is always better.” In thick woods, a 12x binocular creates a narrow “toilet-paper-tube” view that makes finding a deer 60 yards away in heavy timber nearly impossible.
Step 2: Size the Objective Lens for a 4.2mm to 5.25mm Low-Light Exit Pupil
Divide the objective lens diameter (the second number, in millimeters) by your chosen magnification to verify the exit pupil measures between 4.2mm and 5.25mm for dawn and dusk hunting.
The second number in 8×42 or 10×50 represents the diameter of the front objective lenses in millimeters. Larger lenses gather a wider cone of ambient light during the critical first and last 30 minutes of legal shooting light, but add substantial glass weight. To find out how much light actually reaches your retina, calculate the Exit Pupil:
$$\text{Exit Pupil (mm)} = \frac{\text{Objective Lens Diameter (mm)}}{\text{Magnification}}$$
In bright daylight, the human pupil contracts to roughly 2mm to 3mm. During twilight (when ungulates and predators move most), the adult human pupil dilates to 5mm to 7mm. If your binocular’s exit pupil is smaller than your dilated eye pupil, the image will appear dim and grainy at dusk. Use these target pairings:
| Configuration | Exit Pupil Calculation | Typical Weight | Best Application |
| 8×32 / 10×32 | $32 \div 8 = 4.0\text{ mm}$ / $3.2\text{ mm}$ | 16–20 oz | Backcountry alpine bowhunting where saving 8 oz beats twilight brightness. |
| 8×42 | $42 \div 8 = 5.25\text{ mm}$ | 22–26 oz | Universal Sweet Spot: Maximum low-light brightness for timber and all-around hunting. |
| 10×42 | $42 \div 10 = 4.2\text{ mm}$ | 23–28 oz | Western Standard: Balances open-country reach, twilight clarity, and packability. |
| 10×50 / 12×50 | $50 \div 10 = 5.0\text{ mm}$ / $4.16\text{ mm}$ | 28–35 oz | Late-season dusk glassing from stationary blinds or pack frames. |
| 15×56 | $56 \div 15 = 3.73\text{ mm}$ | 40–46 oz | Dedicated tripod-mounted long-range canyon scouting. |
You’ll know it worked when: You hold the binoculars 12 inches away from your face aimed at a bright wall and see a crisp, perfectly round circle of light floating in the center of each eyepiece measuring at least 4mm across.
- Common Mistake: Carrying a 50mm or 56mm binocular around your neck on a 10-mile mountain hike. Anything over 30 ounces pulls down on your cervical spine and causes severe trapezius fatigue within three hours unless supported by a rigid pack or tripod.
Phase 2: Filter Build Architecture, Glass Tier, and Biometrics
Step 3: Select Prism Architecture, Chassis Material, and IPX7 Waterproofing
Choose a nitrogen- or argon-purged Roof Prism binocular with a magnesium-alloy chassis and an IPX7 waterproof rating for rugged field durability.
Binoculars use internal glass prisms to flip the magnified image right-side up. You must choose between three structural categories:
| Prism / Type | Structural Design | Pros | Cons | Price Range |
| Roof Prism | Straight, H-bar barrels where objective and ocular lenses align linearly. | Compact, fits bino harnesses, fewer moving external parts, easily sealed against water. | Requires precision phase-correction coatings to avoid contrast loss. | $150 – $3,000+ |
| Porro Prism | Offset, Z-shaped barrels where front lenses sit wider than eyepieces. | Natural 3D depth perception, wide FOV, high optical clarity under $200. | Bulky, misses standard chest harnesses, external focus bridges break and leak easily. | $70 – $400 |
| Laser Rangefinder (LRF) | Roof prism housing integrated laser emitter and digital OLED display. | Combines optics and ballistic yardage in one button press; saves vital seconds on stalks. | Heavy (30–38 oz), battery-dependent in freezing weather, 2–5 year electronics warranty. | $800 – $4,000 |
When inspecting the spec sheet, verify three non-negotiable environmental specs:
- Inert Gas Purging: Must state Nitrogen-purged or Argon-purged. Dry inert gas replaces internal oxygen and moisture so the interior lenses never fog up when moving from a warm truck cab into 15°F (-9°C) mountain air.
- Waterproof Rating: Require IPX7 (submersible in 1 meter of water for 30 minutes) or higher. Reject anything labeled “water-resistant” or IPX4.
- Chassis Material: Look for a magnesium-alloy or polycarbonate housing wrapped in non-slip rubber armor. Avoid cheap aluminum housings, which bend upon impact and knock the prisms out of alignment.
You’ll know it worked when: The binocular tubes form two straight, parallel cylinders with an internal center focus wheel, and the spec sheet explicitly lists nitrogen/argon purging plus an IPX7 (or depth-equivalent) submersion rating.
Step 4: Verify BAK-4 Prisms, ED Glass, and Phase-Correction Coatings
Confirm the optical spec sheet lists BAK-4 (or Abbe-Koenig/Schmidt-Pechan) prisms, Fully Multi-Coated (FMC) lenses, Phase-Corrected roof prisms, and ED/HD glass elements.
Raw untreated glass reflects up to 5% of incoming light at every air-to-glass surface. Because a modern binocular contains 6 to 10 internal lens elements, uncoated glass loses nearly 50% of available light before it hits your eye, turning a twilight buck into a dark smudge. Filter your budget tier using these exact optical markers:
- Budget Tier ($70 – $250): Often uses BK-7 glass and standard multi-coated lenses. Acceptable for bright midday scouting, but suffers from soft edges and dim low-light transmission (75%–82%). Minimum requirement if buying here: Insist on BAK-4 barium crown glass prisms and Fully Multi-Coated (every air-to-glass surface coated) lenses.
- Mid-Range Sweet Spot ($250 – $800): This is where serious hunters should buy. Require ED (Extra-Low Dispersion) glass to prevent color fringing, Phase-Correction coatings on the roof prisms (prevents split light waves from washing out contrast), and Dielectric prism coatings (reflects 99% of light through the prism). Delivers 86%–90% light transmission.
- Premium / High-End Tier ($800 – $1,500): Uses high-density (HD) fluoride-containing glass, magnesium chassis, and hydrophobic exterior coatings (like Vortex ArmorTek or Zeiss LotuTec) that shed rain and tree sap. Reaches 90%–92%+ light transmission.
- Ultra-Premium / Alpha Glass ($1,500 – $3,500+): Manufactured by Swarovski (NL Pure, EL), Leica (Noctovid, Ultravid), and Zeiss (Victory SF). Incorporates field-flattener lenses for zero distortion right to the steel rim, extending legal target identification 15 to 20 minutes deeper into dusk.
You’ll know it worked when: You hold the front objective lenses under an overhead room light at a 45-degree angle and see deep, uniform green, amber, or violet anti-reflective tints rather than a glaring white mirror reflection—and looking at the exit pupil reveals a perfectly round circle (BAK-4) rather than a circle with squared-off gray edges (inferior BK-7).
Step 5: Match Eye Relief and Interpupillary Distance (IPD) to Your Face
Measure your pupil-to-pupil spacing in millimeters and verify the binocular offers at least 15mm to 18mm of eye relief (if you wear glasses) and an IPD hinge range that covers your facial width.
Most guides skip biometric fit, causing hunters to buy expensive glass that gives them instant blackouts or headaches. Execute two physical measurements:
- Check Eye Relief: Eye relief is the exact distance (in millimeters) your cornea must sit behind the rear ocular lens to see the full Field of View without dark crescent shadows (“kidney-beaning”).
- Without Glasses: Any eye relief from 13mm to 16mm works comfortably with the twist-up eyecups twisted all the way out (counter-clockwise).
- With Eyeglasses or Sunglasses: Eyeglass lenses push the binocular further from your eyes. You must select a binocular with 15mm to 19mm of eye relief and use it with the eyecups twisted all the way down/in (clockwise).
- Measure Your Interpupillary Distance (IPD): Stand in front of a mirror, hold a millimeter ruler against your brow, and measure the distance between the centers of your pupils while looking straight ahead. Most adults fall between 58mm and 70mm. Check the binocular’s minimum and maximum hinge fold specification (typically 56mm to 74mm). If you have a narrow face (54mm–57mm) and buy a binocular with a 60mm minimum hinge width (common on large 50mm/56mm models and some rangefinding binos), the barrels will physically collide before aligning with your eyes.
You’ll know it worked when: You fold the central bridge hinge until the two separate circular views merge into one crisp, single circle with zero dark crescent shadows around the outer perimeter when blinking naturally.
Phase 3: Field-Test and Calibrate Your Optics
Step 6: Run the High-Contrast Edge and Chromatic Aberration Test
Focus on a high-contrast dark object against a bright background 50 to 100 yards away to check for purple/green color fringing and edge-of-field blur.
Never judge binoculars by looking at a mountaintop wallpaper ten feet away inside a sporting goods store. Walk to the front door or window of the shop (or test outside upon delivery) and run this two-part optical stress test:
- The Chromatic Aberration (CA) Test: Aim the center of the view at a dark tree branch, telephone wire, or dark roof edge silhouetted against a bright sky or white building 75+ yards away. Look closely at the hard border between the dark object and the bright background. Lower-grade glass fails to focus red, green, and blue light wavelengths onto the exact same point, creating a neon purple, magenta, or lime-green halo along the edge. Good ED/HD glass shows a clean, sharp black line.
- The Edge-to-Edge Sharpness Test: Focus critically on a license plate or brick wall in the dead center of your view. Now, without moving the binoculars, shift only your eyeballs to look at the outer 20% perimeter of the circle. Cheap optics turn blurry or curve straight vertical lines outward like a fishbowl (pincushion/barrel distortion) in the outer third of the lens. Quality hunting optics keep text legible at least 80% of the way to the edge, allowing your peripheral vision to catch the flick of a bedded buck’s ear without panning the barrels.
You’ll know it worked when: Dark branches against a bright sky show zero neon purple or green borders, and letters positioned two-thirds of the way toward the outer edge of the lens remain sharp enough to read without moving your hands.
Step 7: Calibrate the Diopter Ring and Verify Harness and Tripod Mounts
Adjust the right-barrel diopter ring to match your individual prescription difference, confirm the center focus wheel turns smoothly with one index finger, and locate the 1/4-20 tripod adapter port.
Almost no human has identical vision in both eyes. Binoculars include a calibrated Diopter Ring (usually located under the right eyepiece or integrated into the center focus wheel) to synchronize both barrels to your eyes. Calibrate it once using this exact procedure:
- Twist the eyecups out (bare eyes) or down (wearing glasses) and fold the hinge to your exact IPD so you see one merged circle.
- Cover the right front objective lens with your hand or the tethered lens cap. Keep both eyes open (squinting distorts the open eye’s cornea).
- Aim at a textured sign or tree bark 50 yards away and turn the center focus wheel until the image in your left eye is razor-sharp.
- Uncover the right front lens and cover the left front objective lens with your hand.
- Do not touch the center focus wheel. Instead, rotate the diopter adjustment ring (marked with $+$ and $-$ hash marks) until the image in your right eye is razor-sharp. Note which hash mark aligns with the index dot so you can reset it instantly if bumped.
- Uncover both lenses. Turn the center focus wheel with your index finger—it should travel from close focus (6–10 feet) to infinity in roughly 1.25 to 1.75 rotations with smooth, damped resistance and zero gritty play.
- Unscrew the small circular emblem cap on the front side of the central hinge (between the objective barrels) to confirm a threaded 1/4-20 UNC brass socket is present for attaching a tripod stud.
You’ll know it worked when: Both eyes view a target at 50 yards for 60 seconds with completely relaxed facial muscles, zero eye strain, and instant simultaneous focus whenever you roll the center wheel to a closer or farther target.
Common Mistakes and How to Fix Them
Even with high-end optics, improper setup or field wear can ruin your sight picture. Use this diagnostic table to fix the five most common binocular failures:
| Symptom / Failure Mode | Root Cause | Exact Fix / Recovery Action |
| Black crescent shadows around the edges (“Kidney-Beaning”) | Your eyes are sitting too close or too far from the exit pupil focal point, or the hinge IPD is misaligned. | If bare-eyed: Twist the eyecups outward (counter-clockwise) 1–3 clicks until shadows vanish. If wearing glasses: Twist eyecups flat down. Readjust the central hinge fold until both circles overlap seamlessly. |
| Mild headache or blurry image after 10 minutes of glassing | The diopter ring is uncalibrated, forcing your brain to strain one eye to fuse a sharp left image with a blurry right image. | Execute the Step 7 calibration sequence from scratch with both eyes wide open (use a lens cap to block the barrels rather than winking). |
| Double vision (two distinct, overlapping images of one deer) | Collimation failure. A hard drop or impact knocked one of the internal prisms out of parallel alignment on its mounting shelf. | Stop looking through them immediately to prevent severe ocular migraines. You cannot fix internal prism collimation in the field; send the unit to the manufacturer under their lifetime warranty. |
| Condensation or misty fog inside the glass barrels | O-ring dry-rot or seal rupture allowed the internal dry nitrogen/argon gas to escape and damp ambient air to enter. | Do not attempt to unscrew the objective rings. Submit an immediate warranty repair claim—re-purging requires a factory vacuum chamber. |
| Severely scratched coatings after cleaning mud or dust off lenses | Wiping dry lenses with a T-shirt, bandana, or dry microfiber cloth grinds microscopic quartz dust particles across soft anti-reflective coatings. | Blow loose grit off first using a rubber air bulb or soft camel-hair brush. Apply liquid lens cleaner or fog your breath onto the glass, then dab lightly with a clean optical microfiber cloth. |
| Bouncing binoculars and severe neck pain on hikes | Using the flimsy factory neoprene neck strap instead of distributing weight across your torso. | Remove the factory neck strap and mount the binoculars into a 4-point fully enclosed chest bino harness (e.g., Alaska Guide Creations, Marsupial Gear, or Vortex GlassPak) adjusted high on your sternum. |
Variations for Specific Hunting Scenarios
1. The Deep-Timber Whitetail & Bowhunter Setup
When hunting from an elevated tree stand at 20 feet or stalking thick eastern hardwood ridges, shots happen inside 40 yards and twigs constantly obstruct your view.
- The Modification: Step down from 10x to an 8×42 Roof Prism with a close-focus distance under 6.5 feet and an FOV exceeding 375 feet at 1,000 yards. Pair it with a magnetic-closure chest harness that opens silently with one hand (avoid Velcro or loud zippers that spook deer at 25 yards) and opens downward (away from your body) so the lid doesn’t interfere with your bowstring draw cycle.
2. The Backcountry Alpine & Ounce-Counting Hunter
When climbing 3,000 vertical feet above timberline with 5 days of food on your back, a 32-ounce binocular feels like a bowling ball on your chest.
- The Modification: Choose between two specialized paths:
- Ultralight Mid-Size (8×32 or 10×32): Drops weight to 16–19 ounces. Invest in the $500–$1,000+ tier (such as the Maven B.3, Zeiss Conquest HD 8×32, or Swarovski CL Companion) so superior 90%+ light transmission coatings compensate for the smaller 32mm objective lens at dusk.
- High-Country Tripod System (10×42 + Carbon Tripod): Keep a 24-ounce 10×42 on your chest, but thread an Arca-Swiss tripod adapter stud (such as an Outdoorsmans or Aziak mount) into the front hinge so you can lock your 10x42s directly onto your carbon trekking-pole tripod, eliminating the need to pack a separate 60-ounce spotting scope.
3. The Heavy-Astigmatism or Eyeglass-Dependent Hunter
Look carefully at how your prescription affects your optics setup.
- Myopia/Hyperopia Only (Nearsighted/Farsighted): You can actually hunt without your glasses. Simply twist the binocular eyecups all the way out and let the center focus wheel and diopter ring correct for your spherical prescription.
- Significant Astigmatism (Cylinder correction $\ge 1.00\text{ D}$): Binocular focus wheels cannot correct for football-shaped corneal astigmatism. You must leave your glasses on to get a sharp image. Prioritize models offering 17mm to 19mm of eye relief and soft rubber eyecups that won’t scratch prescription anti-glare coatings.
How Long Does It Take and What Does It Cost?
Selecting, testing, and calibrating a pair of hunting binoculars takes 45 to 60 minutes total. Plan to budget across the entire optical carry system rather than just the bare glass:
| Budget Tier | Binocular Price | Representative Real-World Models | Required Accessories Cost | Total System Cost |
| Entry / Budget | $130 – $250 | Vortex Diamondback HD, Nikon Prostaff P7, Athlon Midas | Basic Harness ($40) + Lens Pen ($12) | $182 – $302 |
| Mid-Range (Sweet Spot) | $350 – $800 | Vortex Viper HD, Maven C.1 / B.1.2, Leupold BX-4 Pro Guide HD | Enclosed Chest Harness ($95–$130) + Lens Kit ($20) | $465 – $950 |
| Premium / High-End | $900 – $1,600 | Zeiss Conquest HDX, Vortex Razor UHD, Leica Trinovid HD | Enclosed Harness ($130) + Tripod Adapter ($65) | $1,095 – $1,795 |
| Alpha / Ultra-Premium | $2,200 – $3,600+ | Swarovski NL Pure / EL, Leica Noctovid, Zeiss Victory SF | Premium Harness ($150) + Outdoorsmans Stud ($90) | $2,440 – $3,840+ |
Warranty Factor: Always check the warranty terms before purchasing. Brands like Vortex (VIP Warranty), Maven, Leupold, and Athlon offer unconditional, no-fault lifetime warranties that repair or replace crushed or dropped optics free of charge—a critical safeguard when scrambling over wet shale in the dark.
Frequently Asked Questions
Is 8×42 or 10×42 better for all-around hunting?
An 8×42 is better if you hunt east of the Mississippi River, inside wooded draws, or from tree stands where targets appear inside 200 yards, because it provides a wider field of view and a brighter 5.25mm exit pupil at dusk. Choose a 10×42 if you hunt open farmland, western sagebrush, or mountain canyons where judging antlers beyond 300 yards is routine.
Are laser rangefinder (LRF) binoculars worth the extra cost and weight?
LRF binoculars are worth the $1,000–$3,500 investment for spot-and-stalk bowhunters and long-range western rifle hunters because they eliminate the 5-to-10-second gap wasted switching between standard binoculars and a separate handheld rangefinder. However, keep in mind that internal laser components reduce light transmission by 3%–5% in one barrel and carry only a 2-to-5-year electronics warranty.
Why does a $500 8×42 binocular look brighter at dusk than a $200 10×50 binocular?
Brightness in low light depends on light transmission efficiency and optical resolution, not just objective lens diameter. A $500 binocular with phase-corrected roof prisms, dielectric mirror coatings, and ED glass transmits ~90% of gathered light cleanly to your eye, whereas a $200 10×50 with untreated prisms and basic coatings reflects and scatters up to 20% of light internally, creating a dim, milky image.
How do I mount hunting binoculars to a tripod?
Unscrew the thin circular manufacturer badge located on the front face of the central hinge bridge (between the two objective barrels) to expose a standard 1/4-20 female threaded socket. Screw a metal binocular tripod adapter stud or strap-style clamp onto the hinge, then snap the adapter base directly into your tripod’s Arca-Swiss or Manfrotto quick-release head.
What is the best way to prevent external lenses from fogging up when breathing heavily?
External lens fogging happens when warm breath or facial sweat rises into cold ocular lenses. Prevent it by adjusting your bino harness straps so the binoculars hang slightly lower on your sternum (below your mouth exhaust when hiking), folding your face mask below your nose while glassing, and applying an anti-fog hydrophobic treatment like Cat Crap or Zeiss Anti-Fog Spray before heading out.
Mastering how to choose hunting binoculars ensures you spend your dawn and dusk hours spotting bedded game rather than fighting blurry glass, blackouts, and eye strain. By matching an 8×42 or 10×42 configuration to your terrain, verifying BAK-4 and ED glass specifications, and calibrating your IPD and diopter settings on the spot, your optics will serve as a lifetime asset in the field.
Compare Top 3 Hunting Binoculars
Your Specific Budget and Hunting Terrain, Including Exact Specs, Pros, and Cons. To narrow down the exact three binoculars that fit your hunting setup, share a few quick details below so I can match the magnification, glass tier, and eye relief to your needs.
In the $250 to $800 mid-range sweet spot, the Vortex Viper HD, Leupold BX-4 Pro Guide HD Gen 2, and Maven C.1 stand out as the top three all-around hunting binoculars. Because you skipped the terrain selection, all three are evaluated below in both 8×42 (best for dense timber and tree stands under 200 yards) and 10×42 (best for mixed farmland and open country beyond 200 yards) configurations.
- Best Overall & Best Included Harness: Vortex Viper HD ($500–$530) — Balances wide field of view, crisp HD glass, and ships with a functional chest harness right in the box.
- Best Low-Light & Backcountry Lightweight Pick: Leupold BX-4 Pro Guide HD Gen 2 ($600–$650) — Japanese-made optics with superior twilight contrast, open-bridge ergonomics, and the lowest carry weight (24 oz).
- Best Value Under $450: Maven C.1 ($375–$400) — Direct-to-consumer pricing delivers Japanese ED glass and dielectric prism coatings for $150 less than retail competitors.
Side-by-Side Specification Matrix (8×42 / 10×42)
| Specification | Vortex Viper HD | Leupold BX-4 Pro Guide HD (Gen 2) | Maven C.1 |
| Typical Street Price | $499 (8×42) / $529 (10×42) | $599 (8×42) / $649 (10×42) | $375 (8×42) / $400 (10×42) |
| Field of View @ 1,000 yds | 409 ft (8x) / 346 ft (10x) | 342 ft (8x) / 309 ft (10x) | 341 ft (8x) / 304 ft (10x) |
| Eye Relief (8x / 10x) | 18.0 mm / 16.5 mm | 19.0 mm / 16.0 mm | 17.0 mm / 15.6 mm |
| Exit Pupil (8x / 10x) | 5.25 mm / 4.2 mm | 5.25 mm / 4.2 mm | 5.25 mm / 4.2 mm |
| Close Focus Distance | 6.0 ft (8x) / 6.5 ft (10x) | 7.5 ft (8x) / 7.5 ft (10x) | 6.5 ft (8x) / 6.5 ft (10x) |
| Interpupillary Distance (IPD) | 56 mm – 75 mm | 58 mm – 74 mm | 56 mm – 74 mm |
| Weight | 24.5 oz (8x) / 24.9 oz (10x) | 24.0 oz (8x) / 24.2 oz (10x) | 24.0 oz (8x) / 24.5 oz (10x) |
| Chassis & Purging | Magnesium / Argon-purged (IPX7) | Aluminum / Nitrogen-purged (IPX7) | Polycarbonate / Argon-purged (IPX7) |
| Prism & Glass Specs | BAK-4, HD Glass, Dielectric, ArmorTek | BAK-4 (Abbe-Koenig style), Calcium-Fluoride HD | BAK-4, Japanese ED Glass, Dielectric |
| Warranty | Unconditional Lifetime (VIP) | Unconditional Lifetime Guarantee | Unconditional Lifetime |
1. Vortex Viper HD (8×42 or 10×42) — Best All-Around Performer
The Vortex Viper HD dominates the $500 price bracket because it leaves zero blind spots in optical clarity, ergonomics, or accessories. Its standout technical advantage is its class-leading Field of View (409 ft in 8×42; 346 ft in 10×42)—giving you roughly 40 to 65 extra feet of horizontal coverage at 1,000 yards compared to the Leupold and Maven.
- Pros:
- Massive Field of View: Makes tracking fast-moving whitetails in thick brush or scanning wide western basins significantly faster with less hand panning.
- Includes the GlassPak Pro Chest Harness: Saves you $80–$100 upfront by including a legitimate, weather-resistant chest harness in the box.
- Locking Diopter Ring: Once you calibrate the right eyepiece to your eyes, the ring locks in place so it never shifts when pulling the binos out of your harness.
- Narrow 56mm Minimum IPD: Fits hunters with narrower facial structures without causing dark kidney-bean shadows.
- Cons:
- Slight Chromatic Aberration at Extreme Edges: When looking at dark tree limbs against a bright white sky, the outer 15% of the lens shows slightly more purple color fringing than the Leupold BX-4.
- Stiff Focus Wheel Out of the Box: The center focus wheel has heavy grease damping that can feel stiff in sub-freezing temperatures until broken in.
2. Leupold BX-4 Pro Guide HD Gen 2 (8×42 or 10×42) – Best for Low Light & One-Handed Grip
If your top priority is squeezing out an extra 10 minutes of legal shooting light in dark timber or deep canyons, the Leupold BX-4 Pro Guide HD edges out the competition. Built around Leupold’s Elite Optical System, it maximizes light transmission in the blue and violet spectrums that dominate the woods at dawn and dusk. The Gen 2 update also adds interchangeable Form-Fit eyecups (including winged side-shields that block peripheral glare).
- Pros:
- Superior Twilight Resolution: Produces noticeably brighter shadow detail and warmer contrast during the first and last 20 minutes of daylight.
- Open-Bridge Ergonomics: Dual small hinges leave a hollow gap between the barrels, allowing your fingers to wrap completely around one tube for effortless one-handed holding while holding a bow or rifle in the other hand.
- Longest Eye Relief on the 8×42 (19mm): The most forgiving eyepiece for hunters who wear thick prescription glasses or shooting sunglasses.
- Cons:
- Narrower Field of View: At 342 ft (8x) and 309 ft (10x), you get a slightly tighter viewing cone than the Vortex Viper HD.
- 58mm Minimum IPD: Hunters with very closely set pupils (under 58mm) may find the barrels cannot fold narrow enough to merge the image comfortably.
3. Maven C.1 (8×42 or 10×42) — Best Value Under $450
Because Maven sells directly to hunters without retail dealer markups, the $375–$400 Maven C.1 incorporates Japanese Extra-Low Dispersion (ED) glass and 99%-reflective dielectric prism coatings normally found in $650+ store-bought binoculars. Its sweet-spot center sharpness rivals optics costing twice as much.
- Pros:
- Unbeatable Center-Field Sharpness per Dollar: Virtually zero color fringing (chromatic aberration) in the center 80% of the lens, making it exceptional for counting antler points at long range on a budget.
- Butter-Smooth Focus Wheel: Uses a wide, machined metal focus wheel that adjusts from 6.5 feet to infinity with effortless single-finger precision even in freezing temperatures.
- Leaves $200+ in Your Budget for Accessories: At ~$400, you have enough budget left over to buy a top-tier aftermarket bino harness (like Marsupial Gear or Alaska Guide Creations) and a tripod adapter while staying well under $600 total.
- Cons:
- Polycarbonate Chassis Instead of Magnesium: To keep weight at 24 oz and price under $400, Maven uses a polymer frame rather than magnesium alloy.
- Non-Locking Diopter Ring: The right-eye diopter ring rotates smoothly without a mechanical lock, so you should mark your calibrated setting with a tiny dot of white paint or tape in case it gets bumped.
Quick Decision Rule: Which Exact Model Should You Buy?
- Choose the 8×42 Vortex Viper HD ($499) if you hunt primarily inside 200 yards (whitetail woods, tree stands, thick brush) and want the widest possible view plus a ready-to-hunt chest harness included.
- Choose the 10×42 Leupold BX-4 Pro Guide HD Gen 2 ($649) if you hunt mixed or open country (200–600+ yards), glass heavily during dark twilight hours, or want the lightest one-handed open-bridge grip.
- Choose the 10×42 Maven C.1 ($400) if you want maximum center-field glass sharpness under $450 so you can pair it with a custom chest harness and tripod mount inside your $800 total budget.
Top 3 Combos Under $150 (Harness + Tripod Adapter)
| Combo Option | Enclosed Chest Harness | Tripod Adapter | Combined Price | Best For |
| Combo 1: Best Overall & Ultralight | AGC Ravus Flex ($110) | Aziak Bino Clamp ($40) | $150 | One-handed silent access + stays inside harness with clamp attached. |
| Combo 2: Best Modular & Breathable | Eberlestock Recon ($129) | Vortex Uni-Daptor ($20) | $149 | Warm-weather stalks, prone crawling, and adding a rangefinder wing. |
| Combo 3: Best Upgrade for Viper HD | Included Vortex GlassPak Pro ($0) | Vortex Pro Binocular Adapter ($70) | $70 | Hunters choosing the Viper HD who want a quick-release metal stud system. |
Part 1: The Best Enclosed Chest Harnesses ($110 – $135)
When pairing a harness with the Vortex Viper HD, Leupold BX-4, or Maven C.1 (all 42mm roof prisms measuring 5.5″ to 5.8″ tall), always select the Small or Medium/Standard harness size so the binoculars don’t rattle inside the pouch.
1. Alaska Guide Creations (AGC) Ravus Flex ($110) – Best Value Under $115
Unlike traditional bulky AGC packs, the Ravus Flex strips away excess front pockets to give you a sleek, no-bounce enclosure that leaves $40 in your budget for a top-tier tripod mount.
- Why It Wins: The lid folds forward (away from your chest) and locks open silently, meaning it never slaps your chin in the wind or blocks your bowstring draw.
- Specs: Fits all 8×42 and 10×42 roof binoculars; fleece-lined interior; dual side stretch pockets for wind checker; laser-cut MOLLE bottom for attaching a holster or rangefinder pouch later.
2. Eberlestock Recon Modular Bino Pack – Size Medium ($129) – Best Breathability
The Eberlestock Recon is the top-tested modular harness for active spot-and-stalk hunting.
- Why It Wins: It uses a lightweight, breathable 3D mesh suspension that fits flat underneath a heavy hunting backpack without digging into your shoulder blades, plus a silent magnetic forward-pull lid.
- Specs: 11.5 oz weight; MOLLE side wings for sliding on a rangefinder pouch; zippered front pocket for tags and calls; elastic safety tethers.
3. Marsupial Gear Enclosed Binocular Pack – Size Small ($135) – Best Dust & Rain Seal
If you hunt dusty sagebrush flats or pouring coastal timber and can stretch your total combo budget to ~$155–$175, Marsupial Gear is the gold standard for full containment.
- Why It Wins: Structured walls and a dual-magnet fold-down lid stay completely open while you glass one-handed, allowing you to drop your binoculars back inside without looking down.
Part 2: The Best Tripod Adapters ($20 – $70)
Most hunters hate traditional L-brackets because you have to unscrew them before putting your binoculars back into your chest harness. These three adapters solve that problem:
1. Aziak Equipment Bino Clamp ($39.99) – Best Low-Profile Design
Instead of threading into the front hinge, the Aziak Bino Clamp is a 0.3-ounce nylon collar that clamps permanently around one objective barrel of your binocular.
- Why It Wins: Because it adds almost zero bulk, your binoculars slide straight into your chest harness with the clamp still attached. Its base is machined with both an Arca-Swiss dovetail (snaps straight into modern hunting tripod heads) and a 1/4-20 female thread (fits any standard camera plate).
- Exact Size to Order for Your Binos: Order Size #1 (46mm – 51.1mm diameter) for the Vortex Viper HD (8×42/10×42), Leupold BX-4 (8×42/10×42), and Maven C.1 (8×42/10×42).
2. Vortex Pro Binocular Adapter ($69.99) – Best Center-Hinge Quick Release
If you prefer mounting from the central bridge for balanced weight distribution, the Vortex Pro Adapter uses a two-piece metal stud and tower system.
- Why It Wins: A tiny brass stud stays screwed into the 1/4-20 socket on the front of your Viper HD, BX-4, or Maven C.1 hinge (fitting easily inside any harness). When you stop to glass, you slide the binoculars onto the narrow aluminum tower post on your tripod until it clicks—and press a thumb lever to release them.
3. Vortex Uni-Daptor ($19.99) – Best Budget Pick to Keep Your Combo Under $150
If you spend $129 on the Eberlestock Recon harness, the $20 Vortex Uni-Daptor keeps your total cost at $149. It uses the same quick-detach stud principle as the Pro Adapter—allowing you to slip the post out of the stud socket in one second before stowing your binoculars.